Formatting marks (¶): see the invisible and understand why your document shifts
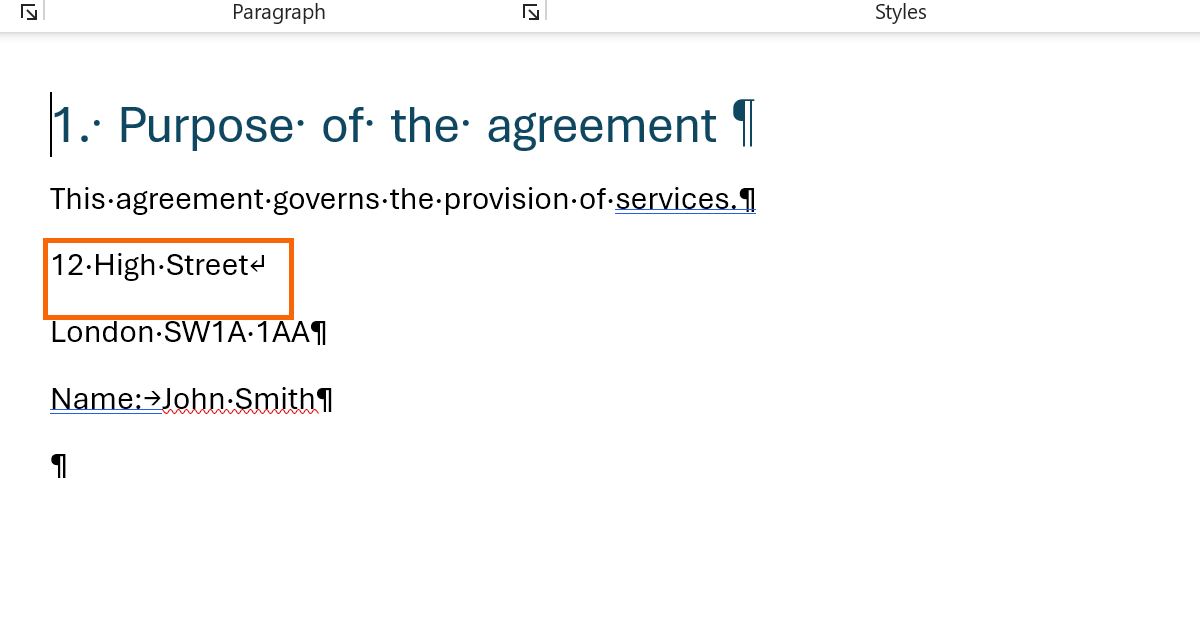
Click the ¶ button (Show/Hide ¶) in Home › Paragraph or press Ctrl+Shift+8. Word reveals the invisible characters: ¶ is an Enter, → a tab, · a space and ↵ a manual line break. With them you can see why there's a blank page or why text jumps around, and remove them in bulk with Find and Replace.
It happens every time: you delete one line and half a page moves. A blank page shows up at the end of the contract and nothing will remove it. You paste text from an AI chat and every sentence starts on its own line. The worst part isn't the problem itself: it's that you can't see what's causing it.
Word hides the characters that don't print: the Enters, the spaces, the tabs, the breaks. They're like the strings of a puppet: invisible, but they move everything. The ¶ button shows them. It's like switching on the light in a dark room: suddenly you understand what you kept tripping over.
Here you learn to read every mark, to keep visible only the ones you care about, and to use them to diagnose and bulk-fix the most common problems.
What you'll learn
- Turn formatting marks on and off with a button or a shortcut
- What every symbol means: ¶, →, ·, ↵, breaks, anchor and hidden text
- Keep the marks you find useful always on, in File › Options › Display
- Diagnose and bulk-clean: a blank page, double spaces and text that jumps around
Step by step
Turn on the marks with the ¶ button (Show/Hide ¶)
Go to Home › Paragraph and click the ¶ button, called Show/Hide ¶ (the last one in the group, on the top row). The document fills up with gray symbols. The text hasn't changed: you're just seeing what was always there. Click it again to hide them.
The shortcut is Ctrl+Shift+8 (Word writes it as Ctrl+*). Memorise it: you'll use it daily.

The marks never print and never show up in a PDF, even when they're visible on screen.
Learn to read the four basic marks
Four symbols explain 90% of what you'll see:
| Mark | What it is | How it's created |
|---|---|---|
| ¶ | End of paragraph. It stores the paragraph formatting: style, alignment, indent and spacing. | Enter |
| → | Tab: a jump to the next tab stop. | Tab |
| · | One space. Two dots in a row, two spaces. | Space bar |
| ↵ | Manual line break: goes down one line without starting a new paragraph. | Shift+Enter |
The difference between ¶ and ↵ is the most confusing one: a ↵ looks like an Enter, but the text is still the same paragraph and shares its style, numbering and spacing. That's why you sometimes apply a style to “one line” and the whole block changes.
Recognize page breaks and section breaks
A page break shows as a dotted line with the words Page Break. A section break is a double line with the words Section Break (Next Page), (Continuous), (Even Page) or (Odd Page). They're inserted from Layout › Page Setup › Breaks (in Word 2016/2019: Page Layout).
Section breaks are the delicate ones: they store the margins, orientation, headers and page numbering of the section that ends there. Delete one and that section inherits the settings of the next, and the document “shifts”. Before touching them, read when to use each kind of break.
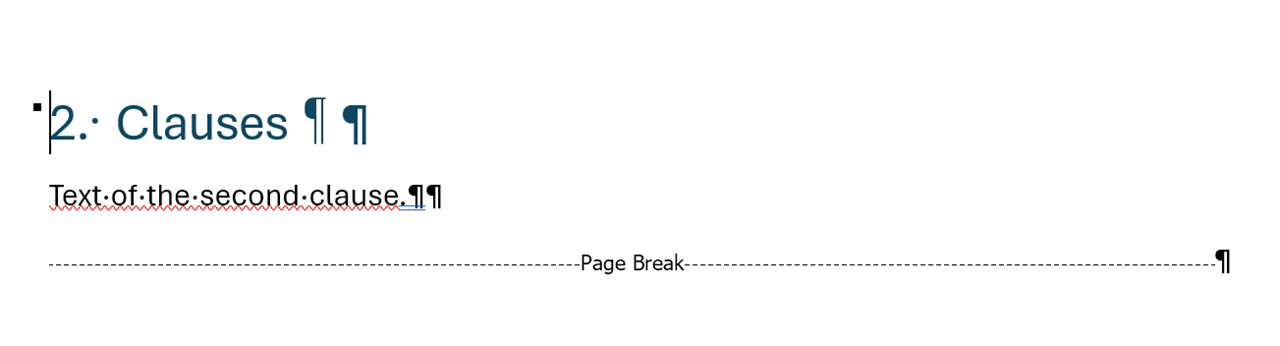
A break is deleted like any other character: click just before it and press Delete. Ctrl+Z brings it back if you slip.
Spot the object anchor and hidden text
Two less common marks that explain a lot of mysteries:
- Anchor: an anchor icon in the left margin, next to the paragraph a floating picture or text box is “tied” to. If that paragraph moves or gets deleted, the picture goes with it. It's behind almost every case of pictures that move on their own.
- Hidden text: shown with a dotted underline. It's text with the Hidden box ticked in the Font dialog (Home › Font › the small arrow in the corner of the group, or Ctrl+D). It doesn't print and isn't visible with marks off, but it's still inside the file.
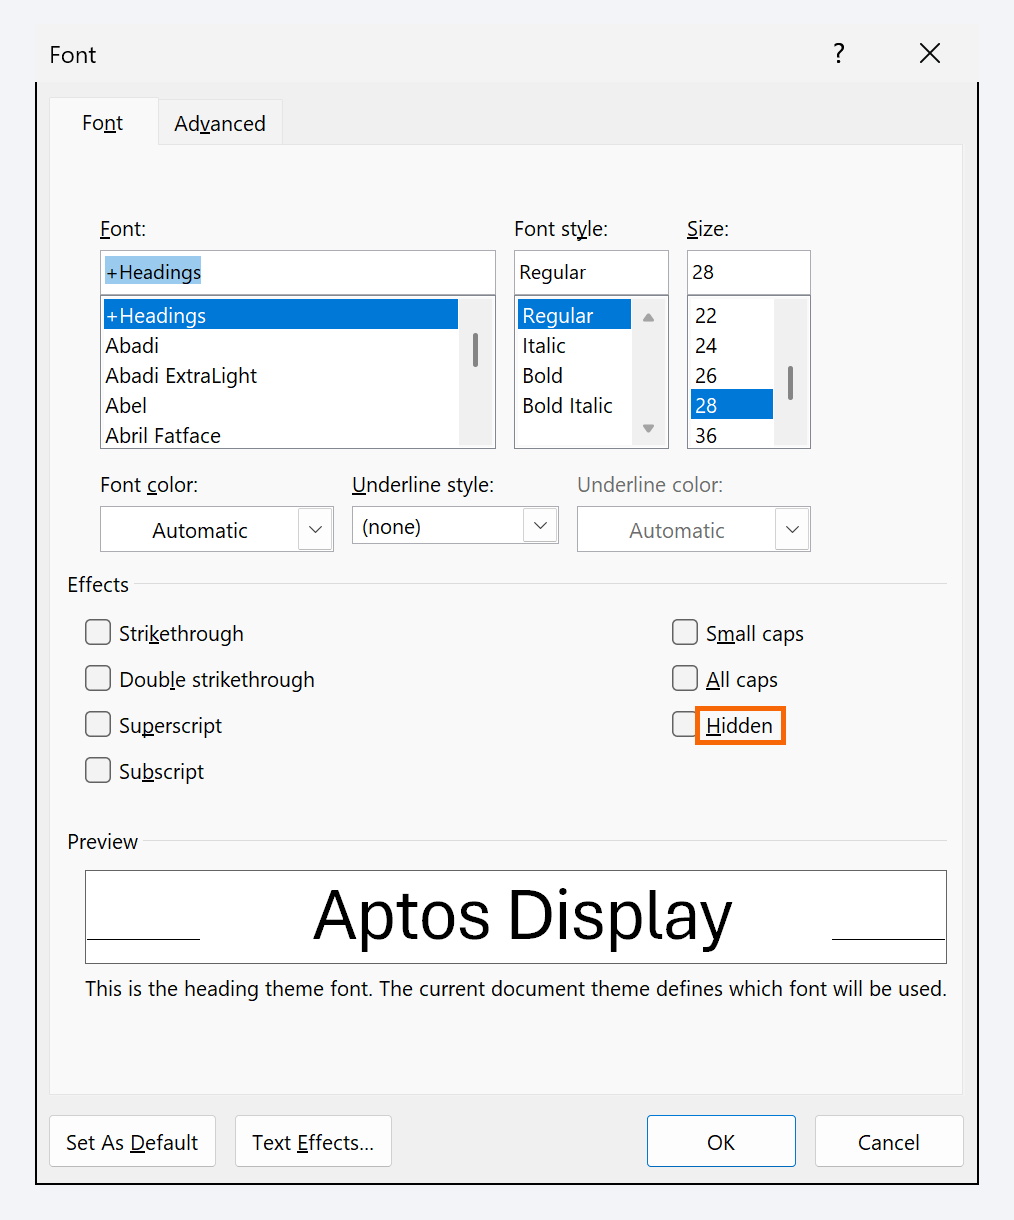
If you send a contract containing hidden text, the other side can turn on the marks and read it. Before sharing, run File › Info › Check for Issues › Inspect Document.
Diagnose a blank page that won't go away
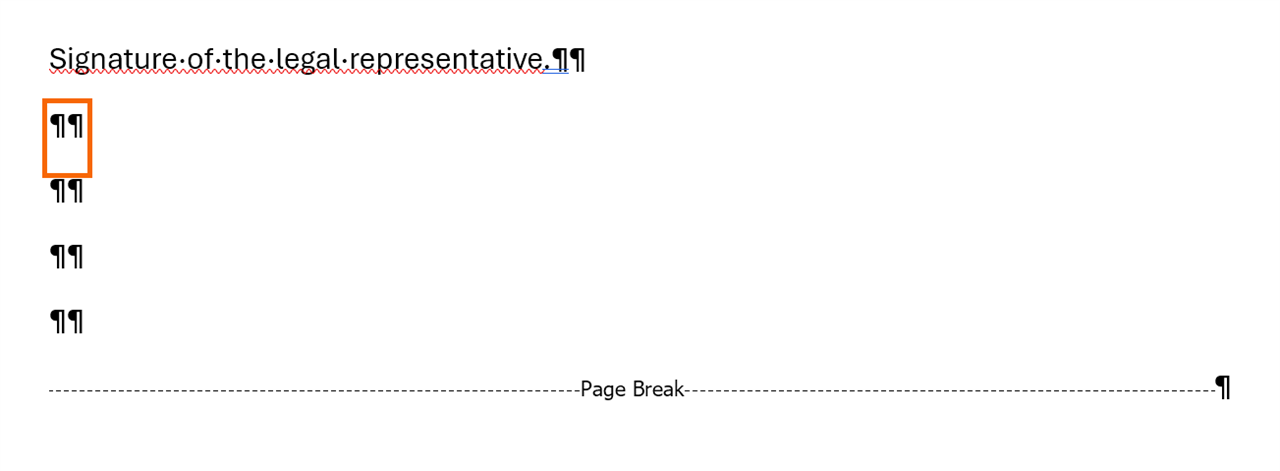
Turn on the marks and go to the empty page. You'll see one of two things:
- A column of ¶: someone pressed Enter many times to “get down” to the next page, or there are leftover Enters at the end. Select them and press Delete. To start a new page on purpose, use Ctrl+Enter.
- A “Page Break” or “Section Break” right before it: click in front of it and press Delete.
Special case: the document ends with a table and an empty page is left after it. Word insists on a ¶ after every table and, if the table reaches the bottom edge, that ¶ spills onto a new page. You can't delete it, but you can shrink it: select it and, in Home › Font, type 1 in the font size box. The page disappears.
Hunt down double spaces and text that jumps
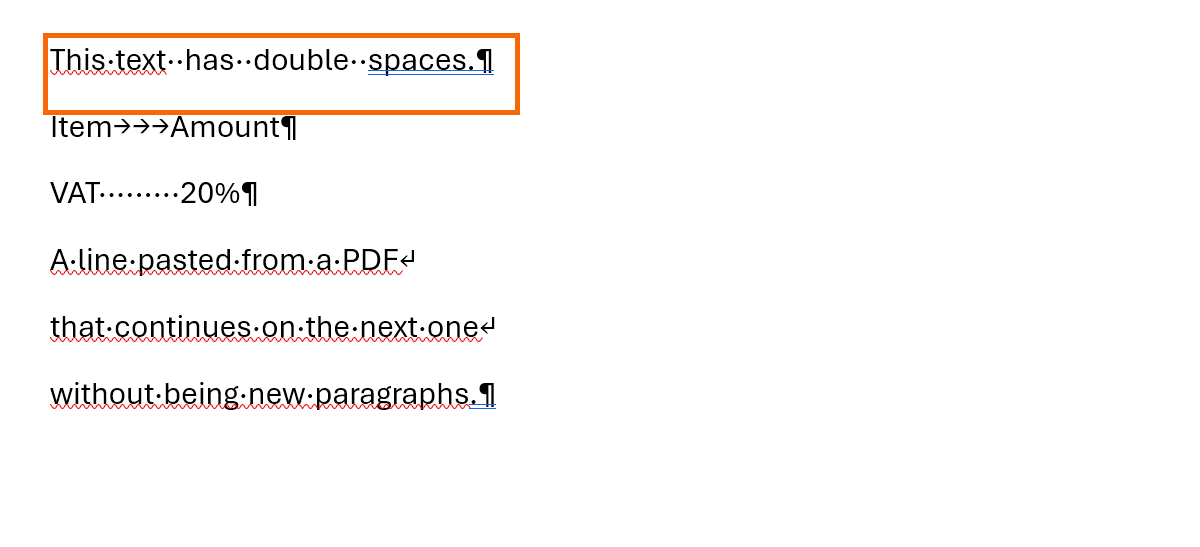
Double spaces. They show as two dots in a row (··). They come from the typewriter habit or from text pasted from the web or an AI chat. In step 8 you remove them all at once.
Text that jumps or won't line up. Three clues: rows of → or of ····· used to line up columns “by eye” (change the font and it falls apart; use a table); a ↵ at the end of every line (typical of text pasted from a PDF or an AI chat); and a small black square in the left margin, which tells you that paragraph has Keep with next or Page break before turned on (Home › Paragraph › corner arrow › Line and Page Breaks).
Keep only the marks you care about always on
Seeing every mark is tiring. You can keep just some of them visible even with the ¶ button off. Go to File › Options › Display and, under Always show these formatting marks on the screen, tick the ones you want: Tab characters, Spaces, Paragraph marks, Hidden text, Optional hyphens and Object anchors. The last box, Show all formatting marks, is the same as the ¶ button. Click OK.
This is a preference of your copy of Word, not of the document: it doesn't travel with the file.
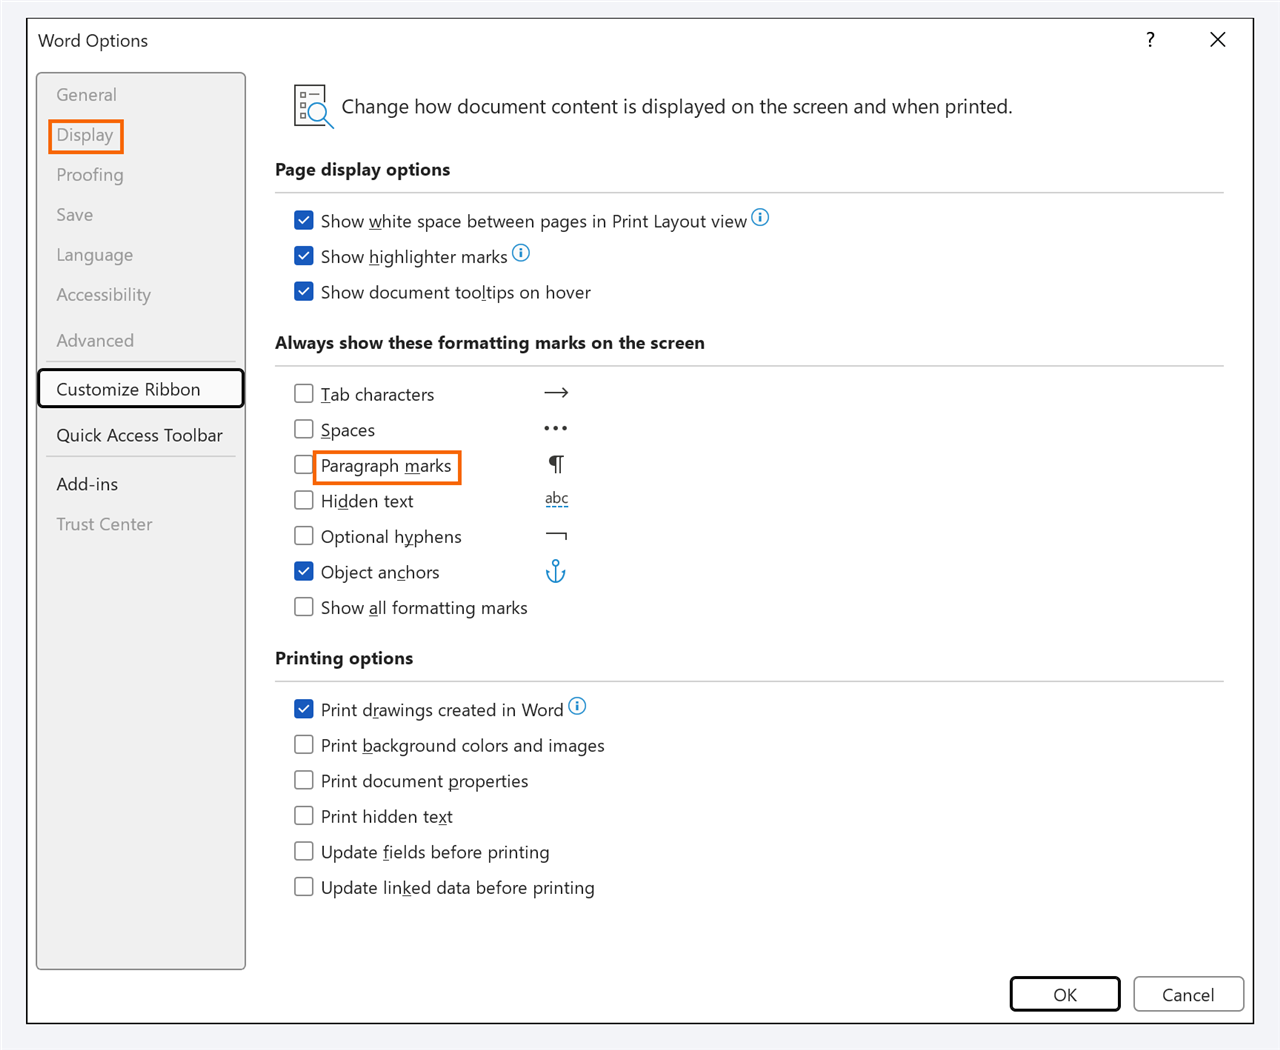
A favorite combination among people who do layout work: Paragraph marks and Object anchors always on; everything else only when you press ¶.
Clean up hundreds of marks at once with Find and Replace
Every mark has a code for Find and Replace (Home › Editing › Replace, or Ctrl+H): ^p paragraph mark, ^l manual line break, ^t tab, ^m page break, ^s nonbreaking space. They're also listed under the More › Special button.
Three clean-ups that solve almost everything:
- Empty paragraphs: find
^p^p, replace with^p. Click Replace All and repeat until it reports 0. - Line breaks into paragraphs: find
^l, replace with^p. - Double spaces: find two spaces, replace with one. Repeat until it reports 0.
For wildcards and formatting, carry on with advanced Find and Replace.
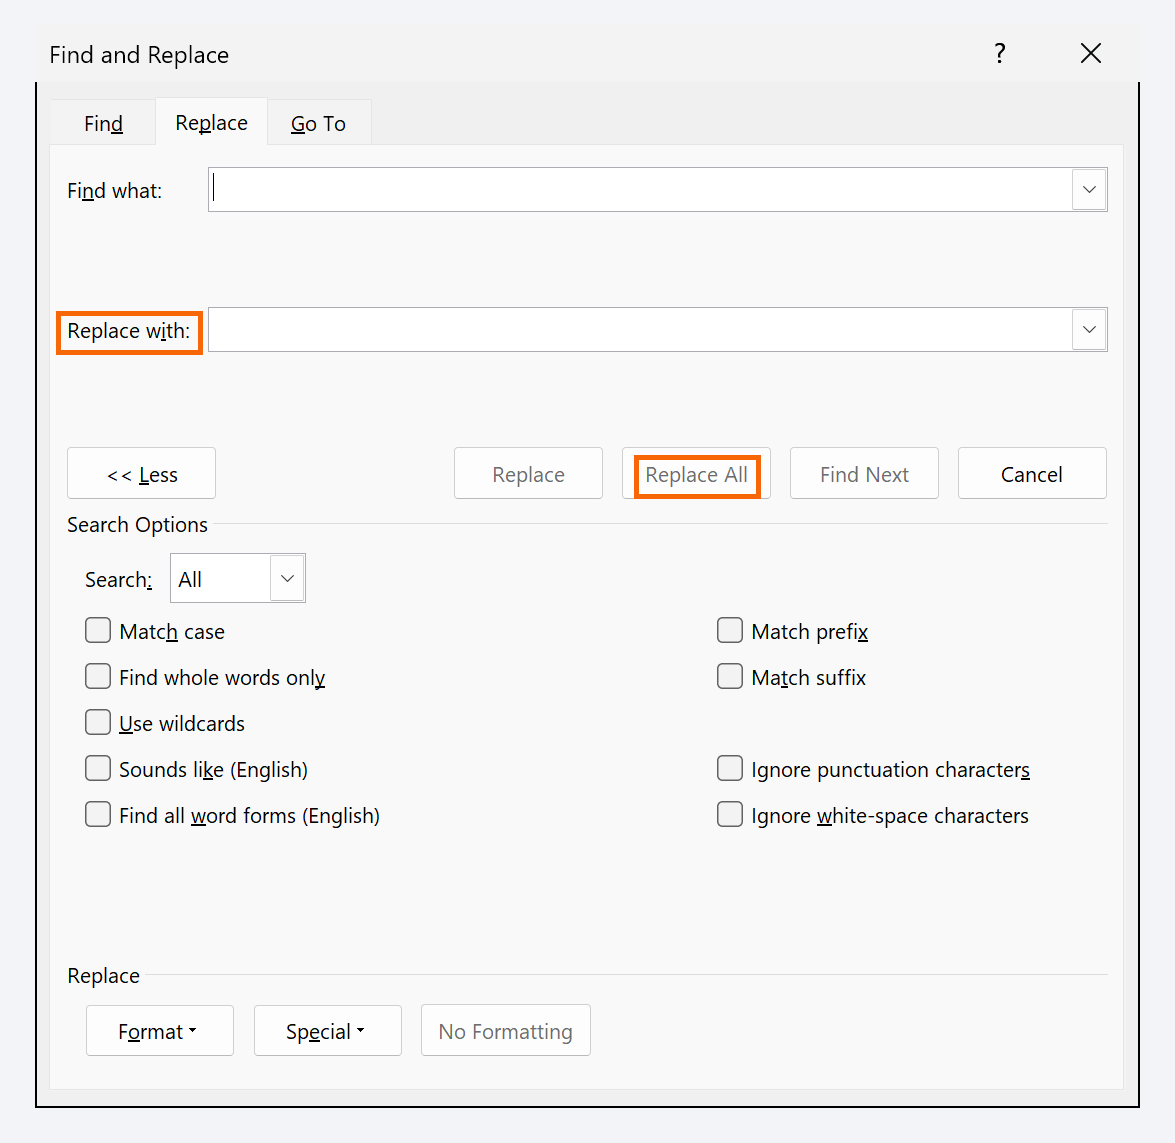
Replace All doesn't ask: save first or keep Ctrl+Z handy. If you have text selected, Word starts with the selection and then asks whether to continue with the rest.
Expert tips
- The ¶ stores the paragraph formatting. Copy a paragraph with its ¶ and it carries its style, alignment and indent along; leave the ¶ out and the text takes on the formatting of the destination paragraph. Delete a ¶ and the two paragraphs merge: only one set of formatting survives.
- Nonbreaking space. It shows as a small circle (°) and you type it with Ctrl+Shift+Space. Use it between “s.” and “15” or between a number and “%” so they never end up on different lines.
- Save Enter for paragraphs. To start a new page, Ctrl+Enter; to separate paragraphs, the style's spacing (see clean design); for columns, tables. Every extra Enter is a future problem.
- AI text: look before you format. Paste the draft, press ¶ and look for ↵ instead of ¶ and for double spaces. Clean it with Find and Replace and apply styles afterwards. More in paste ChatGPT text without breaking the formatting.
Common mistakes and how to fix them
The marks stay visible even after you turn the ¶ button off.
Some marks are pinned in File › Options › Display. Untick the boxes under “Always show these formatting marks on the screen”.
You delete a ¶ to join two lines and the paragraph changes style.
That's expected: the formatting lives in the paragraph mark, and when two paragraphs merge only one survives. Reapply the right style from the Home › Styles gallery.
You replace ^p^p with ^p and now the paragraphs run together with no gap.
The empty Enters were providing that gap. Set it in the style instead: Home › Styles › right-click Normal › Modify › Format › Paragraph › Spacing After (for example, 8 pt).
In Word for Mac the ¶ button is also in Home › Paragraph and the shortcut is ⌘+8. To pin marks: Word menu › Preferences › View › Show Non-Printing Characters. Find and Replace is under Edit › Find › Replace… and accepts the same codes.
Frequently asked questions
Do formatting marks print or show up in the PDF?
No, they're only an on-screen aid. The one exception is hidden text: it prints if Print hidden text is ticked in File › Options › Display.
What's the difference between Enter and Shift+Enter?
Enter creates a new paragraph (¶) with its own formatting. Shift+Enter (↵) moves down one line inside the same paragraph. Use it in addresses or to split a long heading without producing two entries in the table of contents.
Why are there dots between the words? Is it a virus?
No. They're spaces with the marks turned on. Press the ¶ button or Ctrl+Shift+8. If they're still there, untick Spaces in File › Options › Display.
And the ¬ and ¤ symbols that sometimes appear?
¬ is an optional hyphen: Word only splits the word there if it lands at the end of a line. ¤ marks the end of every cell and row in a table; when a row is too tall, there are usually empty ¶ inside the cells.
Official sources
Microsoft documentation consulted for this guide.
Saved only in this browser.