Pictures that stay put: text wrapping, anchors and position
Select the picture and click the Layout Options icon that appears beside it: pick a wrapping style (Square, Top and Bottom…) and choose Fix Position on Page. Turn on formatting marks (Ctrl+Shift+8) to see the anchor and drag it to the paragraph the picture belongs to. Exact position: Picture Format › Arrange › Position › More Layout Options.
You place a picture, drag it into position… and the moment you type one more line above it, it jumps to the next page, covers a paragraph or vanishes. It isn't bad luck: Word places pictures by two rules nobody ever explained to you.
The first is text wrapping. A picture that is “in line with text” behaves like a giant letter: it lives inside the paragraph and moves with it. A “floating” picture (Square, Tight, Behind Text…) lives on top of the page and text flows around it. The second is the anchor: every floating picture is attached to a paragraph and goes wherever that paragraph goes. If the anchor sits in the wrong paragraph, the picture “jumps”. Once those two rules are clear, you stop fighting pictures.
What you'll learn
- The difference between an in-line picture and a floating one
- What the anchor is, how to see it with formatting marks (¶) and how to move it to the right paragraph
- How to pin a picture to the page, and why it can still jump to another one
- How to change the default wrapping, compress pictures and add alt text
Step by step
Insert the picture and see how it arrives: “In Line with Text”
Go to Insert › Illustrations › Pictures › This Device… and choose the file. Word drops it where the cursor was, with In Line with Text wrapping: the picture is one more character in the paragraph. You can't drag it just anywhere, but it can't run away either: if the paragraph moves down, so does the picture.
For reports, theses and contracts this is usually the best choice. You only need a floating picture when text must flow around it or it must sit at a fixed spot on the page: a logo, a signature, a stamp.

Click the Layout Options icon and choose how text flows around it
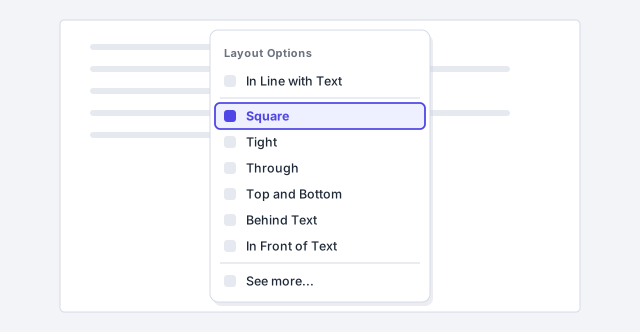
Click the picture, then click the icon that appears at its top-right corner: Layout Options. You'll see two blocks, In Line with Text and With Text Wrapping. The same choices live in Picture Format › Arrange › Wrap Text (in Word 2016/2019: Picture Tools › Format).
- Square: text flows around the picture's rectangle. The classic.
- Tight and Through: text hugs the outline of the figure; only makes sense with transparent backgrounds.
- Top and Bottom: text above and below, never beside.
- Behind Text: watermarks and letterheads.
- In Front of Text: signatures and stamps that cover what's underneath.
With “Behind Text” the picture is hard to select again. If you “lose” it, find it in Picture Format › Arrange › Selection Pane.
Turn on formatting marks and find the anchor
Press Ctrl+Shift+8 (or click the ¶ button in Home › Paragraph) and select the floating picture. In the left margin, next to one paragraph, an anchor icon appears. Word calls it an object anchor; everyone calls it the anchor. That paragraph “owns” the picture: if it moves to the next page, the picture goes too.
If it sits in the wrong paragraph (say, the heading of the previous section), drag it with the mouse to the paragraph that talks about the picture. The picture doesn't move; it only changes owner. More on formatting marks (¶).

Decide: “Move with Text” or “Fix Position on Page”
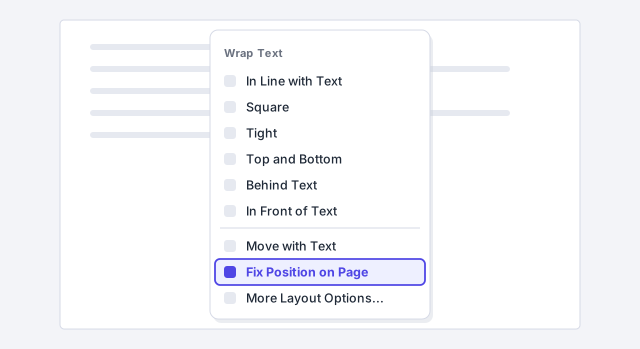
In Layout Options (or in Wrap Text), below the wrapping styles, are two options that answer a single question: does the picture travel with its paragraph, or stay still on the page?
- Move with Text: the picture keeps its distance from the anchor paragraph; add text above and it moves down with it. For a photo that illustrates a specific paragraph.
- Fix Position on Page: the picture stays at those coordinates even when the text moves. For a logo, a scanned signature or a design element.
Careful: “fixing” does not break the anchor. If the anchor paragraph moves to another page, the picture shows up at the same position… on the new page. That's why step 3 matters.
Place it precisely: More Layout Options › Position
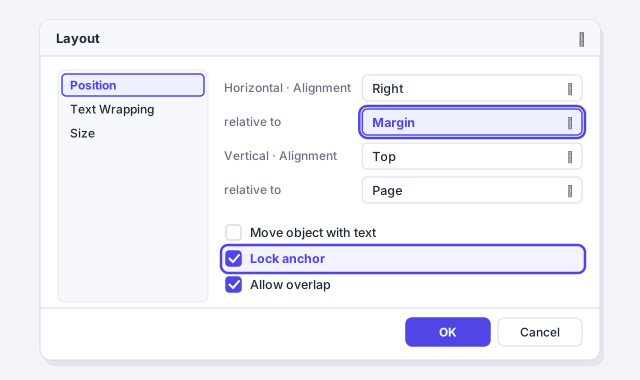
For an exact position, go to Picture Format › Arrange › Position › More Layout Options…. The Layout dialog opens on the Position tab. Under Horizontal and Vertical you pick an Alignment (Right, Top…) relative to the Page, the Margin, the Column or the Paragraph, or type an Absolute position in inches or centimeters.
At the bottom, under Options, are the two key boxes: Move object with text (the choice from step 4) and Lock anchor, which stops the anchor from switching paragraphs when you drag the picture. Always tick it for logos, stamps and signatures.
The Position gallery offers nine ready-made spots (“top right with square text wrapping”…) that cover most cases.
Stop the picture jumping to another page
First culprit: the anchor sits in a paragraph that no longer fits on the page, so Word carries paragraph and picture to the next one, leaving a gap. Fix: drag the anchor to the right paragraph (step 3) or, for a design element, Fix Position on Page plus Lock anchor.
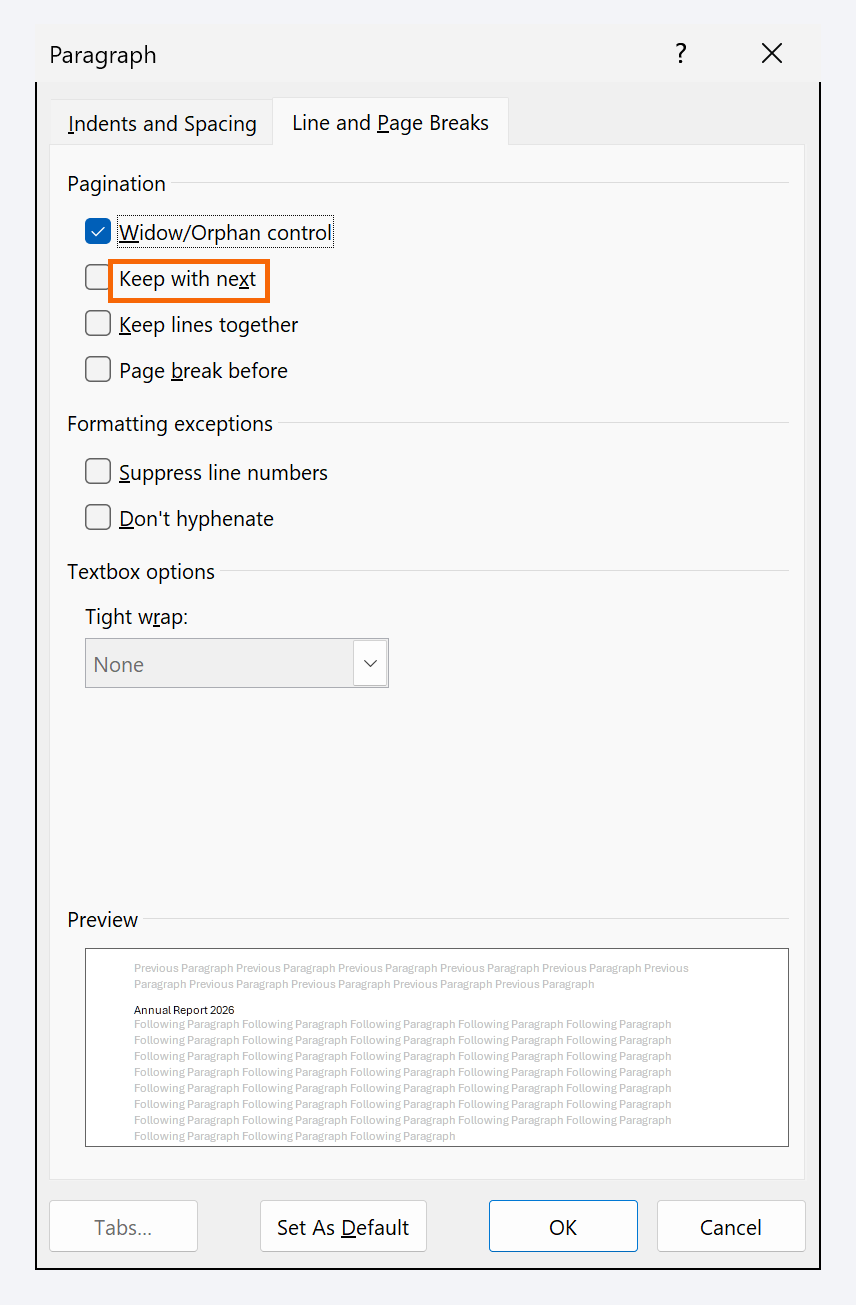
Second: the picture is in line, in its own paragraph, and the caption lands on the next page. Click the picture's paragraph, open the Home › Paragraph dialog (the small launcher button in the corner of the group), go to Line and Page Breaks and tick Keep with next: picture and caption now travel together. To keep it with its section heading, anchor it to the heading, which already has that box ticked.
Pushing the picture down with a few Enters works until you edit anything above. Use the anchor and “Keep with next”, not empty lines.
Change the default wrapping for future pictures
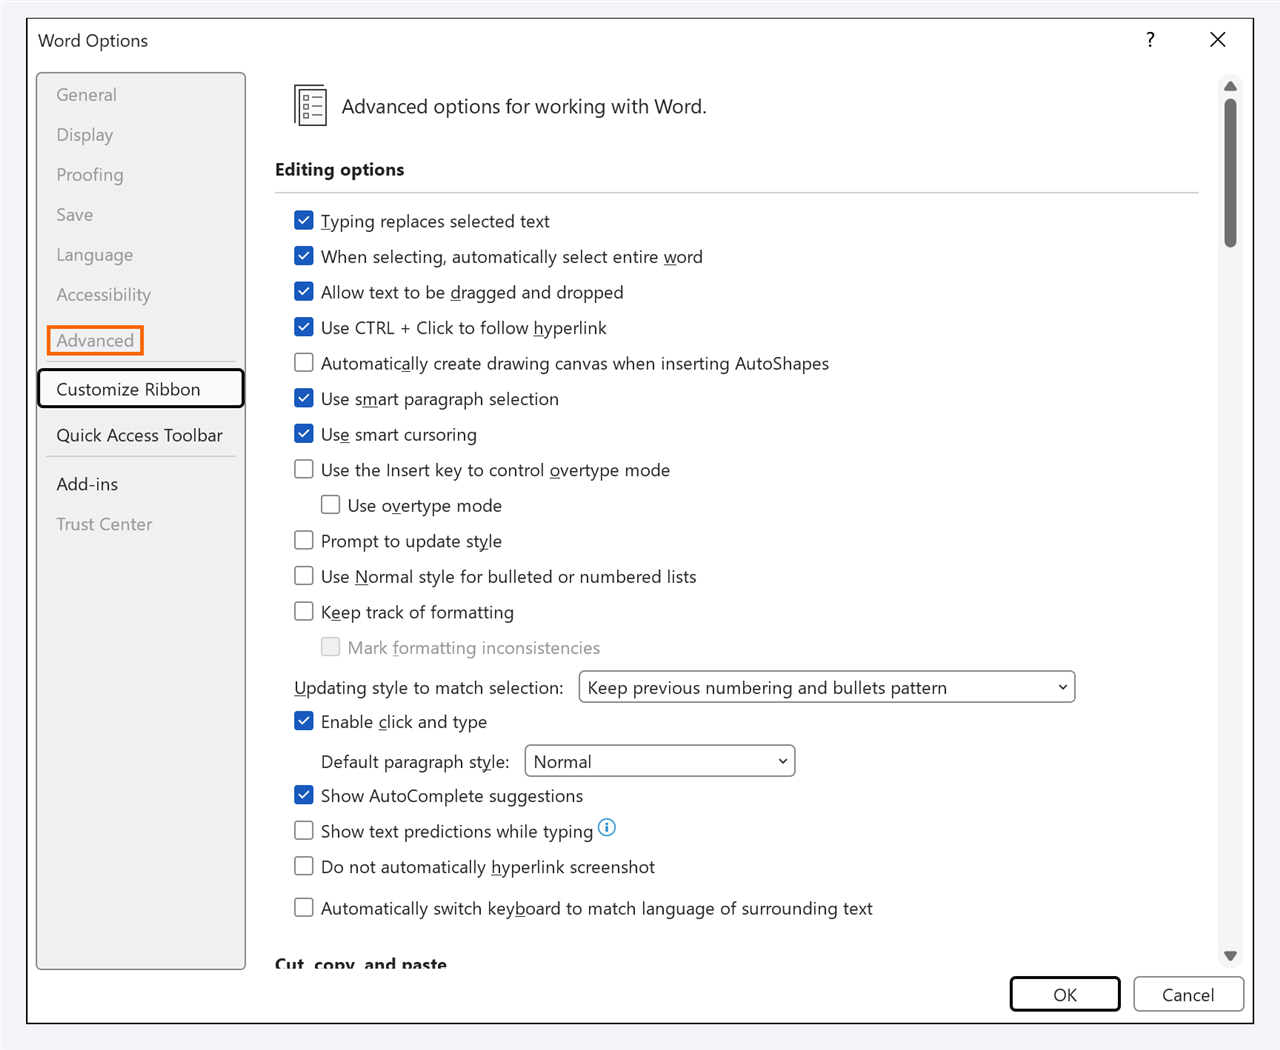
If you always want pictures with Square wrapping (or always in line), don't change them one by one: go to File › Options › Advanced › Cut, copy, and paste and change Insert/paste pictures as. From then on, every new picture, inserted or pasted, arrives that way. Shortcut: with a picture already set up the way you like, open Wrap Text › Set as Default Layout.
Compress pictures so the file doesn't weigh 40 MB
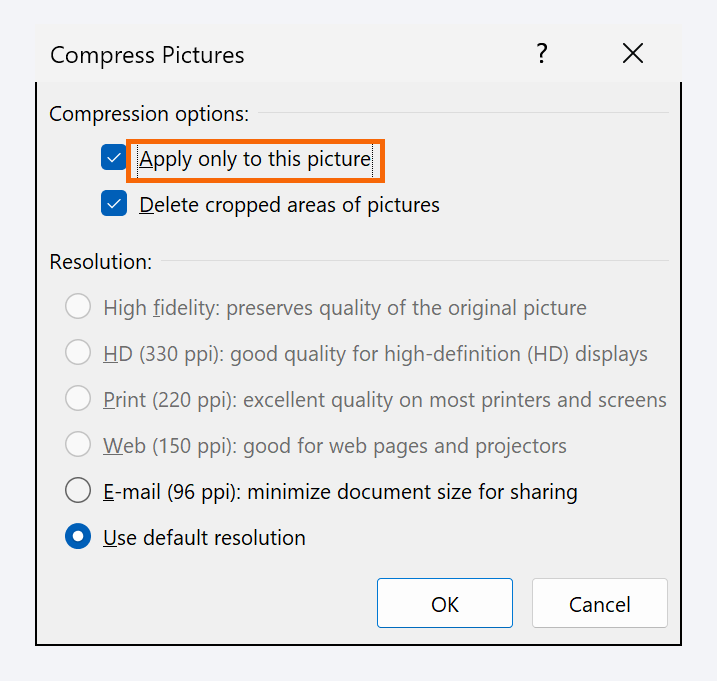
Phone photos and AI images carry far more resolution than needed. Select any picture and go to Picture Format › Adjust › Compress Pictures. Untick Apply only to this picture to treat them all, leave Delete cropped areas of pictures ticked and pick Print (220 ppi) if the document gets printed or Web (150 ppi) if it's only read on screen.
Add alt text to every picture
Alt text is the description a screen reader reads aloud. Right-click the picture and choose View Alt Text… (or Picture Format › Accessibility › Alt Text). Write one or two sentences saying what the picture shows and why it's there: “Bar chart: 2025 sales by quarter, peaking in Q3”. If it's pure decoration, tick Mark as decorative. More in accessible documents.

Expert tips
- The 90% rule. Reports, theses, contracts: picture in line with text, in its own centered paragraph, with a caption inserted from References › Insert Caption, which numbers itself: captions and cross-references.
- A logo that never moves. Put it in the header with Behind Text, Fix Position on Page and Lock anchor: it repeats on every page and the body text can't touch it. More in letterhead and watermark.
- Signature and stamp in a contract. Picture set to In Front of Text, anchored to the signature-block paragraph (“For the Buyer”) with the anchor locked. If the contract grows, the signature travels with that paragraph.
- AI images. The ones ChatGPT, Copilot or Gemini generate are usually huge PNGs: crop them with Picture Format › Size › Crop and compress them (step 8).
Common mistakes and how to fix them
You delete an empty paragraph and the picture vanishes with it.
It was anchored to that paragraph. Press Ctrl+Z, turn on formatting marks and drag the anchor to a paragraph with text before deleting.
You set “Fix Position on Page” and the picture still shows up on another page.
Fixing only fixes the coordinates within the anchor's page; if the anchor paragraph moved to another page, the picture follows it. Move the anchor to the right paragraph and lock it.
You can't select the picture with the mouse.
It's behind the text or covered by another object. Open Home › Editing › Select › Selection Pane and click it in the list.
Word for Mac doesn't show the Layout Options icon beside the picture: use Picture Format › Wrap Text and Picture Format › Position, which hold the same choices (including More Layout Options…). Formatting marks toggle with ⌘+8 and the anchor shows and drags the same way.
Frequently asked questions
What's the difference between “In Line with Text” and “Top and Bottom”?
They look alike, but the first is part of the paragraph (no anchor, can't be dragged) while the second is floating: you can drag and anchor it. When in doubt, use “In Line with Text”.
Why can't I see the anchor even with formatting marks on?
The anchor only appears when a floating picture is selected; in-line pictures have none. If it still doesn't show, turn on File › Options › Display › “Object anchors”.
Can I lock the picture so nobody can move it?
“Lock anchor” locks the anchor, not the picture: it can still be dragged with the mouse. To truly prevent that you need to restrict editing: protect the document.
Does this work the same for shapes, text boxes and icons?
Yes. Wrapping, anchor, position and “Keep with next” work the same with any floating object; only the name of the contextual tab changes (Shape Format, Chart Format…).
Official sources
Microsoft documentation consulted for this guide.
Saved only in this browser.