Fillable forms in Word: checkboxes, drop-downs and date pickers nobody can break
Turn on the Developer tab in File › Options › Customize Ribbon. Insert the blanks from Developer › Controls (text, check box, drop-down list, combo box, date picker), set them up in Properties and protect the document with Review › Restrict Editing › Filling in forms. Save it as a Word Template (*.dotx).
You send out a client intake sheet or an application in Word and it comes back mangled: someone deleted a line, someone else typed over the heading, one person wrote the date as “Jan-15” and another as “next Monday”. Blanks made of underscores don't work: the text pushes the line, everything shifts and nobody knows where to type.
Word has a feature built for exactly this: content controls. They're “shaped” boxes inside the document: a text blank, a box to tick, a closed list of choices or a calendar to pick a date from. Think of a paper form with printed boxes: people only write inside the boxes.
In this guide you build a complete form, give it clear instructions, lock it so only the blanks can be filled in, and save it as a template you can reuse forever.
What you'll learn
- How to show the Developer tab, which is hidden by default
- Which control to use when: text, check box, drop-down, combo box or date
- How to give each control a title, a tag and a lock
- How to change the instruction text with Design Mode
- How to protect the form so only the blanks can be filled in
Step by step
Show the Developer tab
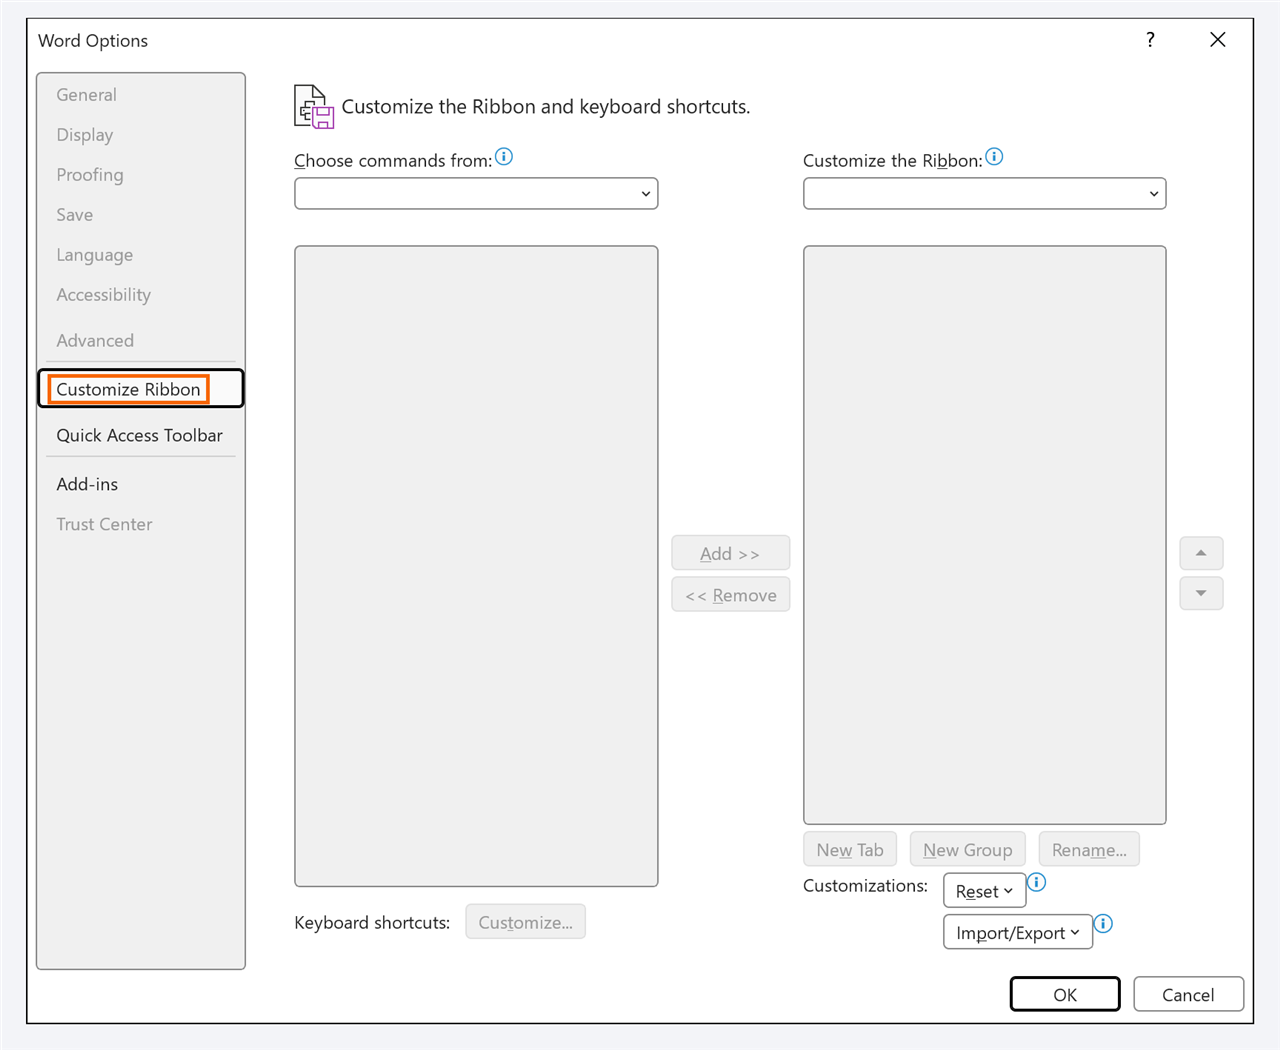
Form controls live on a tab Word hides by default. Go to File › Options › Customize Ribbon. In the list on the right, Main Tabs, check Developer and click OK.
A new tab appears on the ribbon. You only do this once: Word remembers it.
Insert text blanks: plain text or rich text
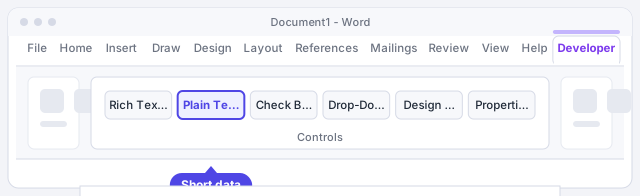
First type the fixed text of the form (the labels “Name:”, “ID number:”, “Address:”). Put the cursor after each label and go to Developer › Controls. Hover over the icons to see their names:
- Plain Text Content Control: for short data (a name, a case number). All the content shares one format.
- Rich Text Content Control: for longer answers where people may use bold, lists or several paragraphs.
A box appears with gray instruction text. That box is the blank.
Use a two-column table with no borders (label on the left, control on the right) and the form stays aligned even when someone types a lot.
Add check boxes, drop-down lists and combo boxes
The same group holds the choice controls:
- Check Box Content Control: a square that toggles on and off with one click. Ideal for “I accept the terms” or for picking optional clauses.
- Drop-Down List Content Control: people can only pick one of your options. No made-up answers.
- Combo Box Content Control: shows your options but also lets people type a different one.
List options are entered in Properties: select the control, click Developer › Properties and, in the list section, use Add… for each option. Display Name is what people see; Value is handy if you later read the data with macros.
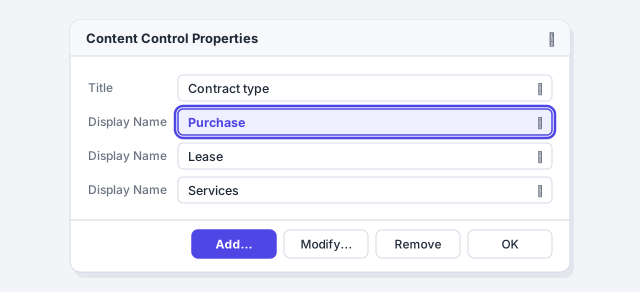
Lawyers: a “Contract type” list (Purchase, Lease, Services) stops every colleague from writing it a different way.
Add a date picker in the format you want
Put the cursor where the date goes and insert a Date Picker Content Control from Developer › Controls. Clicking it opens a calendar: nobody types “next Monday” again.
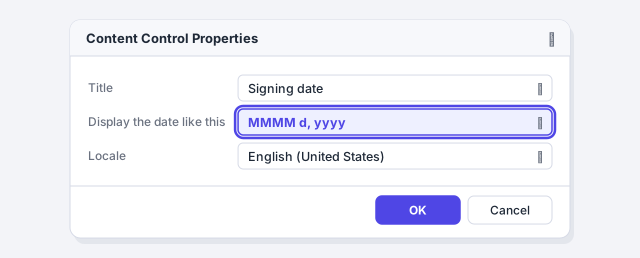
In Properties, choose how the date is shown under Display the date like this, for example MM/dd/yyyy or MMMM d, yyyy, and check that the Locale matches your country so month names come out right.
Give each control a title, a tag and a lock
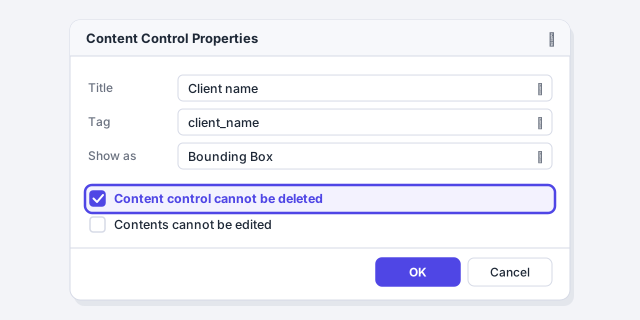
Select a control and open Developer › Properties. At the top are Title (the name shown on the little tab of the box when you click it, helpful for whoever fills it in) and Tag (an internal name nobody sees, useful for macros or for finding the control).
Further down, in the locking section, check Content control cannot be deleted. People can type inside but can't delete the blank by accident. The other box, Contents cannot be edited, is for fixed text nobody should touch.
Change the instruction text with Design Mode
The gray text each control comes with (“Click or tap here to enter text.”) is generic. Replace it with useful instructions: turn on Developer › Design Mode, click inside the control, delete the gray text and type your own, for example “Full legal name as shown on your ID”. Click Design Mode again to leave.
That text disappears as soon as someone types in the blank and comes back if they empty it.
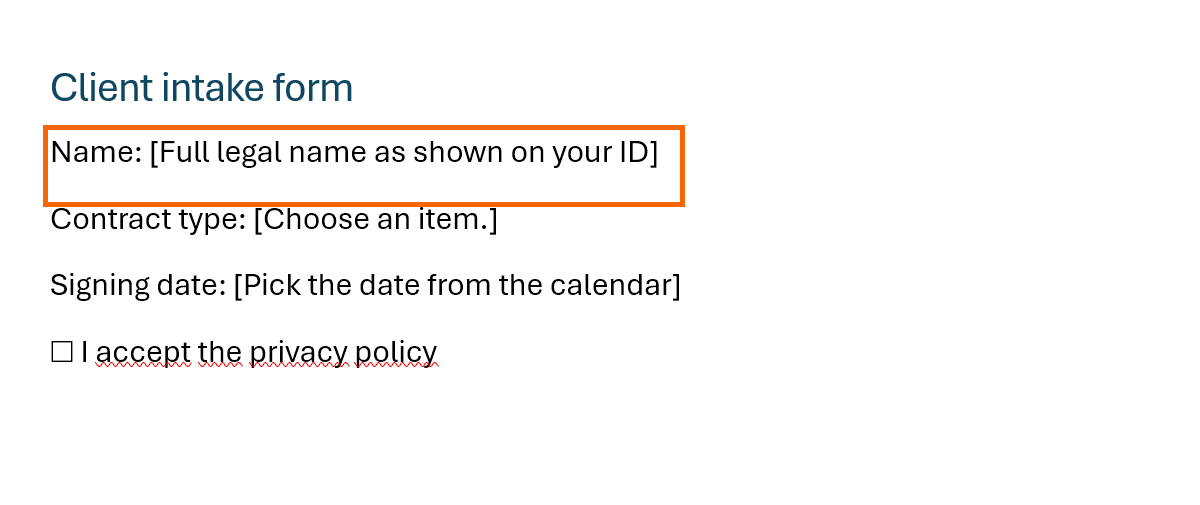
While Design Mode is on, the controls show their design markers and don't behave as they will in the finished form. Turn it off before you protect and share the document.
Protect the form so only the blanks can be filled in
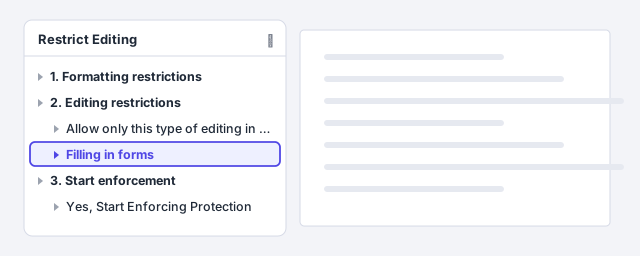
Go to Review › Protect › Restrict Editing (it's also under Developer › Protect). In the pane, under Editing restrictions, check Allow only this type of editing in the document and choose Filling in forms. Click Yes, Start Enforcing Protection and add a password if you like.
From now on the fixed text can't be changed, and Tab jumps from one blank to the next.
The password prevents mistakes, not attacks: it isn't encryption. For confidential data, also use File › Info › Protect Document › Encrypt with Password.
Save it as a template
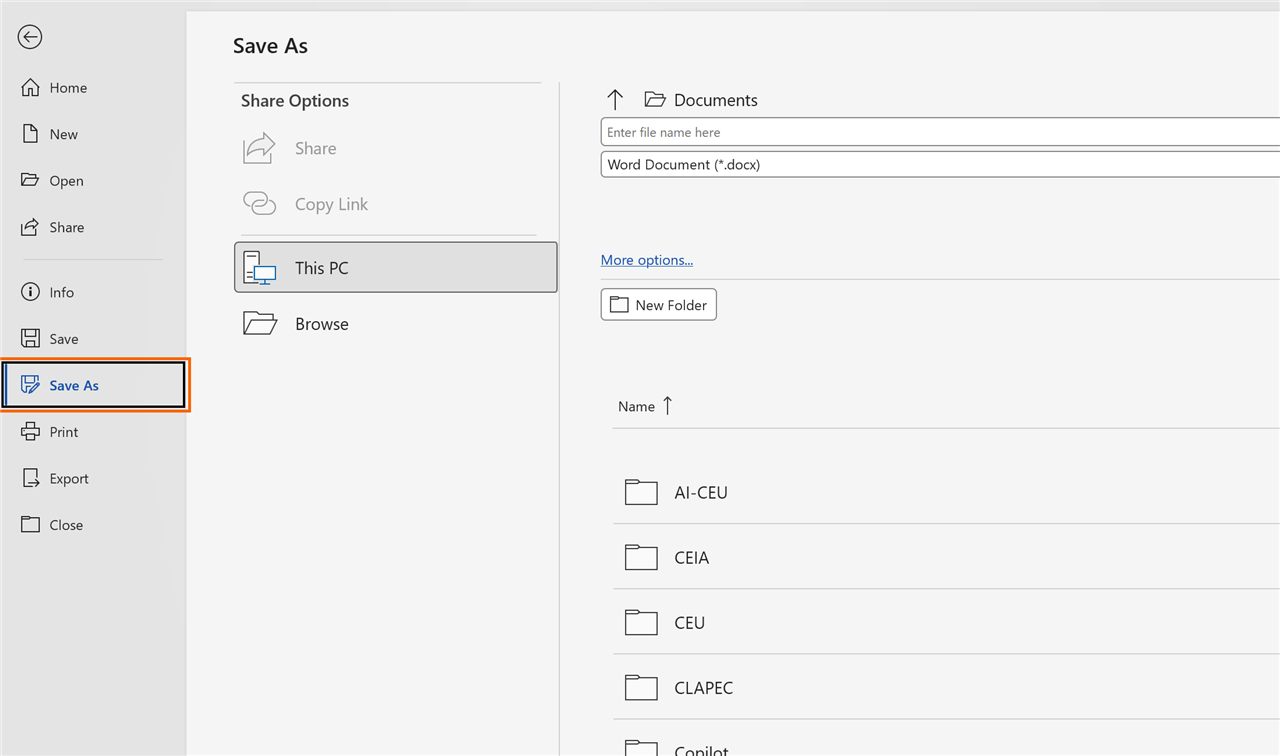
Go to File › Save As, choose the folder and, as the file type, pick Word Template (*.dotx). Whenever someone double-clicks the template, Word creates a new document based on it and the original stays untouched.
Share the template with your team or keep it in your personal templates folder so it shows up under File › New.
Expert tips
- Check boxes that look the part. In a check box control's properties you can change the checked symbol (for example, a ☒ or a ✓) so it looks the same on screen and on paper.
- One style for the answers. In Properties, the option to use a style for text typed into the control makes every answer come out, say, in blue: you can tell at a glance what the client wrote.
- Legacy fields, for compatibility only. Developer › Controls › Legacy Tools still holds the old form fields (text, check box, drop-down). Use them only if the form will be filled in with very old versions of Word; they only work while “Filling in forms” protection is on.
- Ask AI for the questions, not the form. ChatGPT or Copilot can help you decide which data to ask for and which options to offer; you build the controls and the protection, which is what keeps the form from breaking.
- Repeated document data belongs in properties. If the same value (client name, case number) appears on several pages, see how to repeat data with document properties.
Common mistakes and how to fix them
The Developer buttons are grayed out and you can't insert controls.
The document is protected or in Compatibility Mode. Stop protection in the Restrict Editing pane, or save the file as .docx with File › Info › Convert.
Someone deleted an entire blank by accident.
Check “Content control cannot be deleted” in each control's properties and also protect the document with Filling in forms.
The drop-down list won't let people type a new option.
That's what a drop-down list does. If you want free answers too, use a combo box control.
The gray instruction text can't be changed.
Turn on Developer › Design Mode, edit the text inside the control and turn Design Mode off when you're done.
In Word for Mac, turn on the Developer tab in Word › Preferences › Ribbon & Toolbar. Which controls are available depends on your version: older versions only offer legacy form fields. Form protection is on the Review tab.
Frequently asked questions
What's the difference between a drop-down list and a combo box?
A drop-down list only lets people pick one of the options you define. A combo box lets them pick an option or type something different.
Does the person filling in the form need the Developer tab?
No. The tab is only needed to create or change the form. To fill it in, they just open the document in Word and click the blanks.
Do the control boxes print?
No. The boxes and control titles only show on screen. On paper you get the content or, if the blank is empty, the instruction text.
Can I leave part of the document editable and protect the rest?
Yes. Split the document with section breaks and, in the Restrict Editing pane, use Select sections to protect only the ones that hold the form.
Official sources
Microsoft documentation consulted for this guide.
Saved only in this browser.