Protect sheets and cells: allow typing only where it belongs
In Excel every cell starts out marked as Locked, but locking does nothing until you protect the sheet. First select the cells people should type in and clear Locked in Format Cells › Protection (Ctrl+1). Then go to Review › Protect Sheet, choose what users may do and, if you like, add a password.
You build a perfect budget template, hand it to a colleague and get it back with the total typed over the formula. Or someone deletes a column “that wasn't used” and nothing adds up anymore. It isn't malice: on an open sheet, everything looks editable.
The fix is to protect the sheet. It works like a paper form: the blank boxes are for filling in and the rest is printed and can't be touched. In Excel it takes two steps, and the order matters: first you unlock the cells people can type in, then you protect the sheet. Do it the other way around and the whole sheet ends up locked.
In this guide you set it up on a quote, hide formulas if you want, and learn why this protection prevents mistakes but is not a security feature.
What you'll learn
- Why you must unlock the input cells before protecting
- How to protect the sheet and choose what others can do
- How to hide formulas and how to remove protection later
- What truly protects a file and what doesn't
Step by step
Decide which cells people can fill in
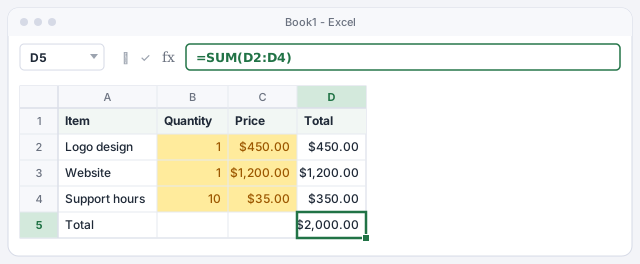
Look at your sheet the way someone else will. In this quote, only quantity and price should be typed (B2:C4). The totals in column D are formulas and must stay intact.
Give those cells a soft fill color: anyone who opens the file will know where to type without reading instructions.
Line total: quantity times price.
Quote total.
Unlock those cells in Format Cells › Protection
Select B2:C4 (for scattered cells, hold Ctrl while you click). Press Ctrl+1 or right-click › Format Cells.... On the Protection tab, clear Locked and click OK.
Nothing seems to change. That's expected: the Locked box only takes effect once the sheet is protected.

Every cell on a new sheet starts with Locked checked. If you protect without this step, nobody will be able to type in any cell.
Hide the formulas if you don't want them seen (optional)
If you'd rather nobody sees how you calculate (internal margins or rates, for example), select the formula cells (D2:D5), go back to Format Cells › Protection and check Hidden. Leave Locked checked.
Once you protect the sheet, the cell still shows the result, but the formula bar stays empty.

Go to Review › Protect Sheet
Open the Review tab and, in the Protect group, click Protect Sheet. It protects only the active sheet: if your workbook has several sheets, repeat the process on each one.

Choose what's allowed and, if you like, set a password
In the Allow all users of this worksheet to list, Select locked cells and Select unlocked cells are already checked. Check whatever others need: for example Sort or Use AutoFilter if the sheet has filters, or Format columns so they can widen columns.
Type a password in Password to unprotect sheet (it's optional), click OK and type it again to confirm.
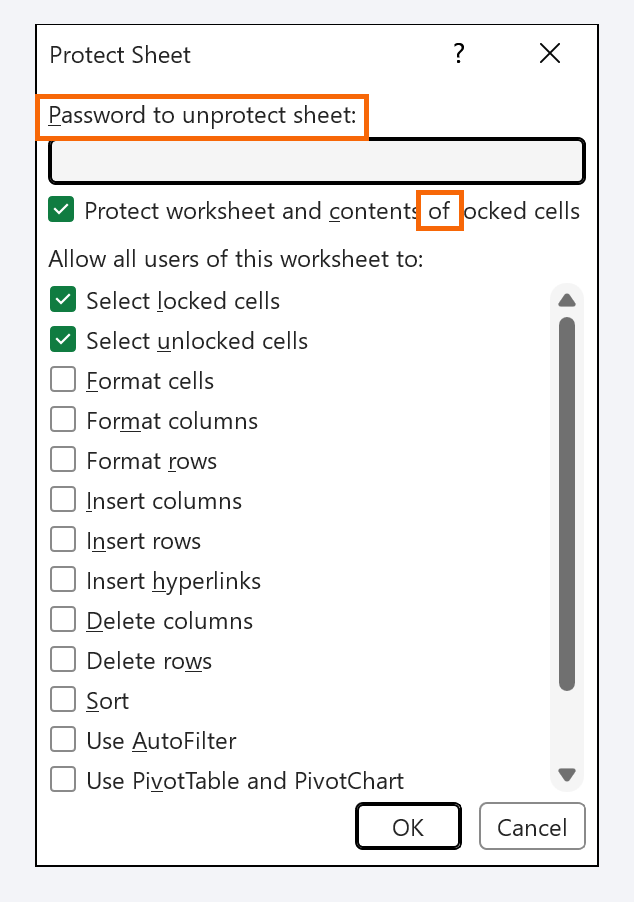
If you forget the password, Microsoft can't recover it. Store it in your password manager.
Test it as if you were someone else
Try typing in a total cell: Excel warns you that the cell is on a protected sheet. Now type in a yellow cell: it works. Press Tab and the cursor jumps straight to the next unlocked cell, just like a form.
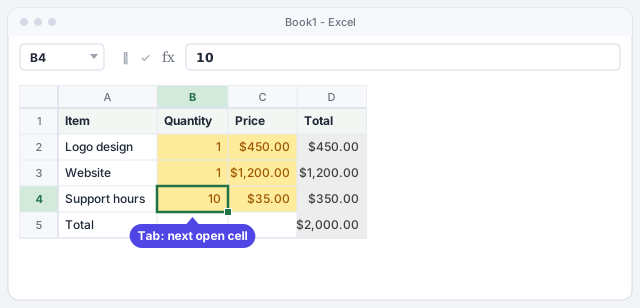
To let people click only the yellow cells, clear Select locked cells when you protect. It feels very tidy in templates that many people fill in.
Remove protection when you need to change the template
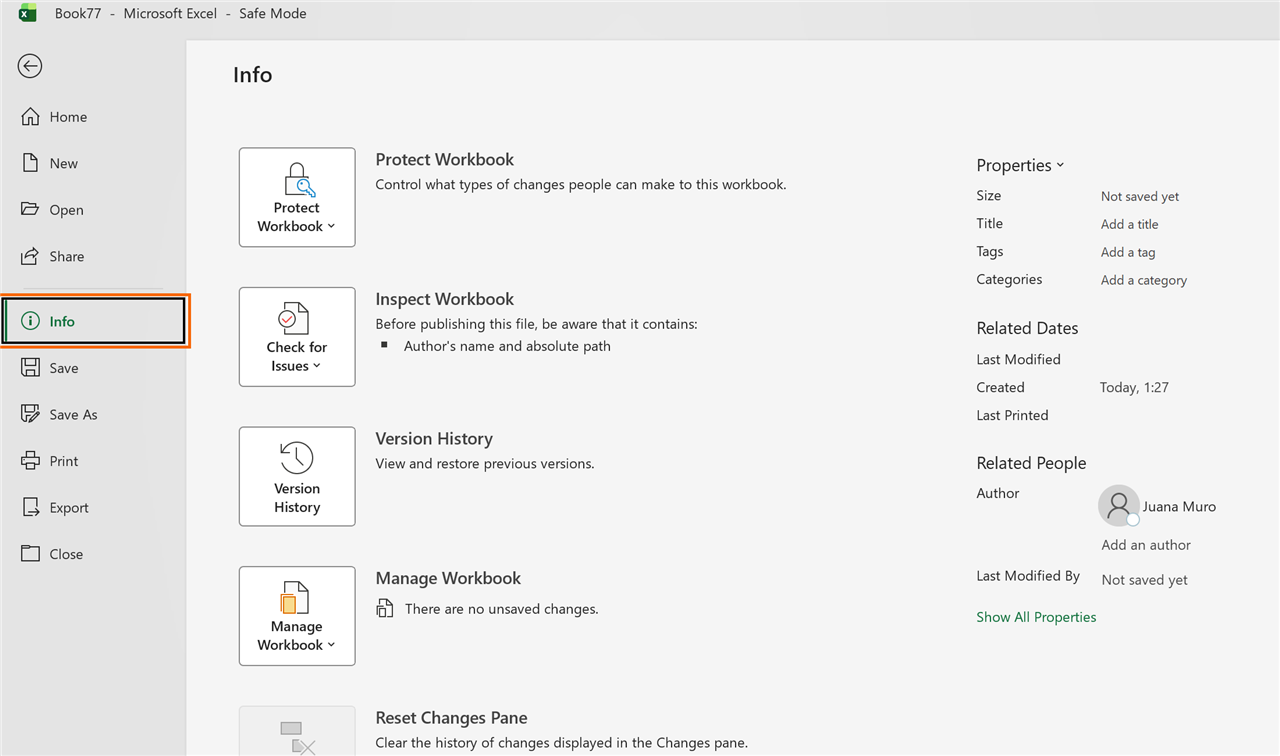
While the sheet is protected, the button changes its name: go to Review › Unprotect Sheet and enter the password if you set one. It's also under File › Info › Protect Workbook. Make your changes and protect it again.

Know the limit: sheet protection is not security
Sheet protection stops mistakes, not snoops. Microsoft says it plainly: it isn't intended as a security feature. Anyone who opens the file can copy the data into another workbook, and there are tools that strip a sheet password in seconds.
If the goal is to keep unauthorized people from opening the file, use File › Info › Protect Workbook › Encrypt with Password. To stop people adding, deleting or hiding sheets, use Review › Protect Workbook.
Expert tips
- Pair it with drop-down lists. Protection stops people touching formulas; data validation stops odd values in the open cells. Together, the template is mistake-proof: drop-down lists and data validation.
- Use the Input cell style. Under Home › Cell Styles, the Input style gives fill-in cells a recognizable look. Apply it before unlocking and you get a consistent visual cue across all your templates.
- Ranges with their own password. With Review › Allow Edit Ranges you can let each department edit only its own area, with different passwords, before protecting the sheet.
- Lawyers and admin staff: in fee, invoice or settlement templates, protect the tax and withholding formulas so nobody overwrites them while adjusting a figure.
Common mistakes and how to fix them
You protect the sheet and nobody can type in any cell.
You skipped the unlocking step. Unprotect the sheet, select the input cells, open Format Cells (Ctrl+1) › Protection, clear Locked and protect again.
With the sheet protected, others can't filter or sort.
Apply filters before protecting and check Use AutoFilter in the Protect Sheet window. For sorting, check Sort, but note that ranges containing locked cells can't be sorted.
An Excel table stops growing when you type below it.
On a protected sheet, tables don't expand automatically. Add empty rows inside the table before protecting, or unprotect the sheet to resize it.
You set a password and can't remember it.
Microsoft can't recover it. Look for an earlier unprotected copy and, from now on, keep passwords in a password manager.
In Excel for Mac it's the same: Format Cells (⌘+1) › Protection › Locked, then Review › Protect Sheet. The permission options and the password work the same way.
Frequently asked questions
Why are all cells locked if nothing happens?
Because the Locked box is just a flag. Excel only enforces it when you protect the sheet. That way, once you protect, everything is closed except what you unlocked beforehand.
Can I protect several sheets at once?
Not from the ribbon: Protect Sheet acts on the active sheet. Repeat it on each sheet or automate it with a macro.
Does protection still work if I share the file on OneDrive?
Yes. Protection travels with the file and is respected even when several people edit at once. More on collaborating in teamwork in Excel.
Does a sheet password stop people from opening the file?
No. For that you need File › Info › Protect Workbook › Encrypt with Password. A sheet password only stops someone removing the protection inside Excel.
Official sources
Microsoft documentation consulted for this guide.
Saved only in this browser.