Cover page, blank pages and a single landscape page
Insert a cover page from Insert › Pages › Cover Page and delete it with Remove Current Cover Page. To make a single page landscape, select its content and go to Layout › Margins › Custom Margins › Orientation: Landscape › Apply to: Selected text. Word inserts the section breaks for you and the rest of the document stays portrait.
It happens with every report: you need a decent cover page, a wide table that only fits in landscape and, the moment you rotate that page, the whole document rotates with it. You patch it by hand, a page number shows up on the cover… and you end up splitting the report into several files.
Think of the document as a building: each section is a floor with its own orientation, margins and header, and Word can build those floors for you. In this guide you insert and fill in a cover page in a minute, keep it unnumbered and free of Heading 1, add blank pages without hammering Enter, rotate a single page and save your corporate cover so you can reuse it in one click.
What you'll learn
- Insert, fill in, swap and remove a cover page from Word's gallery
- Keep the cover page unnumbered and out of the table of contents
- Insert blank pages and page breaks without breaking the document
- Make a single page landscape and control its header and page number
- Save your own corporate cover page to the gallery
Step by step
Insert a cover page from the gallery
Go to Insert › Pages › Cover Page. A gallery opens with designs such as Facet, Integral or Ion. Click one and Word places it at the very beginning of the document, wherever your cursor is, on its own page.
Word treats it as a building block of its own: that's why you can later swap it or remove it in one go.

Already have the text written (or generated by AI)? The cover goes in front and pushes everything else down one page.
Fill in the cover page's content controls
The bracketed text such as [Document title], [Author name] or [Date] are content controls: boxes that already carry the formatting. Click each one and type; Date opens a calendar picker.
Title and author are bound to the document properties (File › Info): change them in one place and they change in the other. To get rid of a control you don't need, right-click it and choose Remove Content Control.
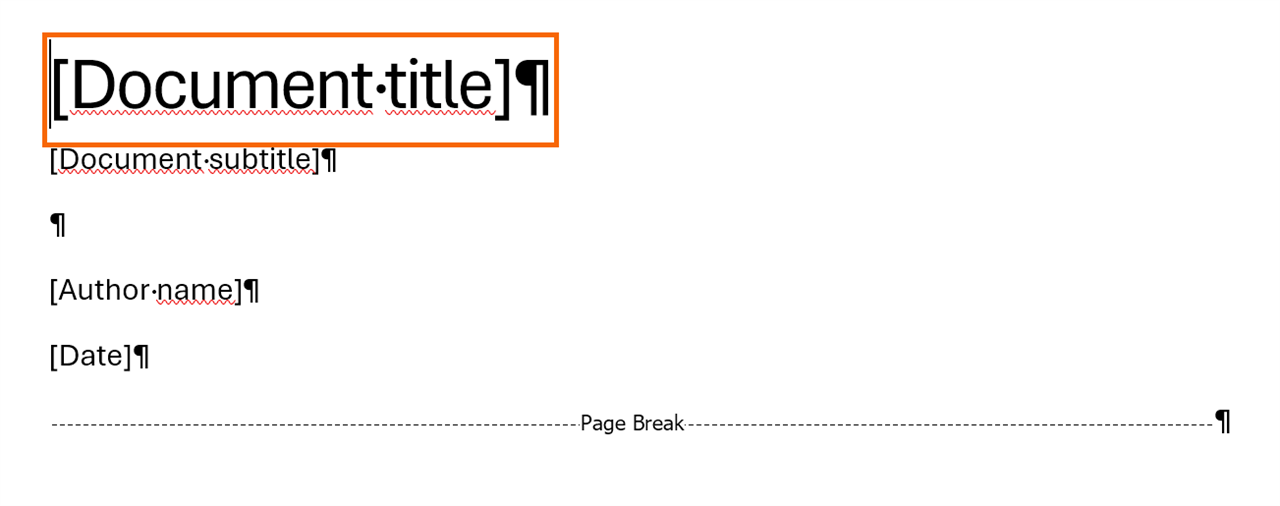
Don't apply Heading 1 to the cover title: it would show up as the first chapter in the table of contents and in the Navigation Pane. Gallery designs already come with their own formatting.
Swap the design or remove the cover page
Not convinced? Go back to Insert › Pages › Cover Page and pick another design: Word replaces the cover and keeps what you typed in the bound controls (title, author). To delete it, choose Remove Current Cover Page from the same menu. No need to select anything.
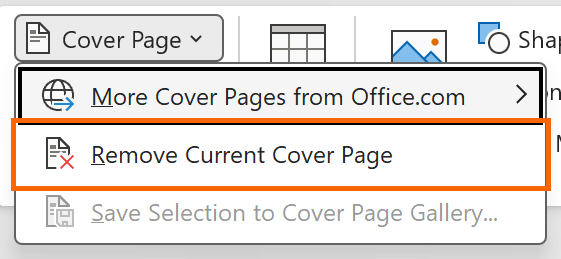
Remove Current Cover Page only works with covers inserted from the gallery. A hand-made cover is deleted like any other text.
Keep the cover page unnumbered
Double-click the footer of any page. On Header & Footer › Options, check that Different First Page is ticked: Word usually turns it on by itself when you insert a gallery cover; if not, tick it yourself. The cover's footer is now empty and every other page keeps its number.
If you want the next page to be “1”, go to Insert › Page Number › Format Page Numbers… and set Start at: 0.

Insert blank pages and page breaks without pressing Enter
To start a chapter on a new page, press Ctrl+Enter or go to Insert › Pages › Page Break. To leave a completely empty page (for example so every chapter starts on an odd page), use Insert › Pages › Blank Page: Word inserts two page breaks with an empty page between them.
Never reach the next page by hammering Enter: as soon as you add a line above, everything shifts. With Ctrl+Shift+8 you'll see the breaks as dotted lines.

Make a single page landscape with “Apply to: Selected text”
Select everything that should be landscape (the wide table, the org chart, the comparison grid). Go to Layout › Page Setup › Margins › Custom Margins… (in Word 2016/2019 the tab is called Page Layout). On the Margins tab choose Orientation: Landscape and, at the bottom, set Apply to to Selected text. Click OK.
Word inserts a Next Page section break before and another after the selection. Only that section rotates; the rest stays portrait.
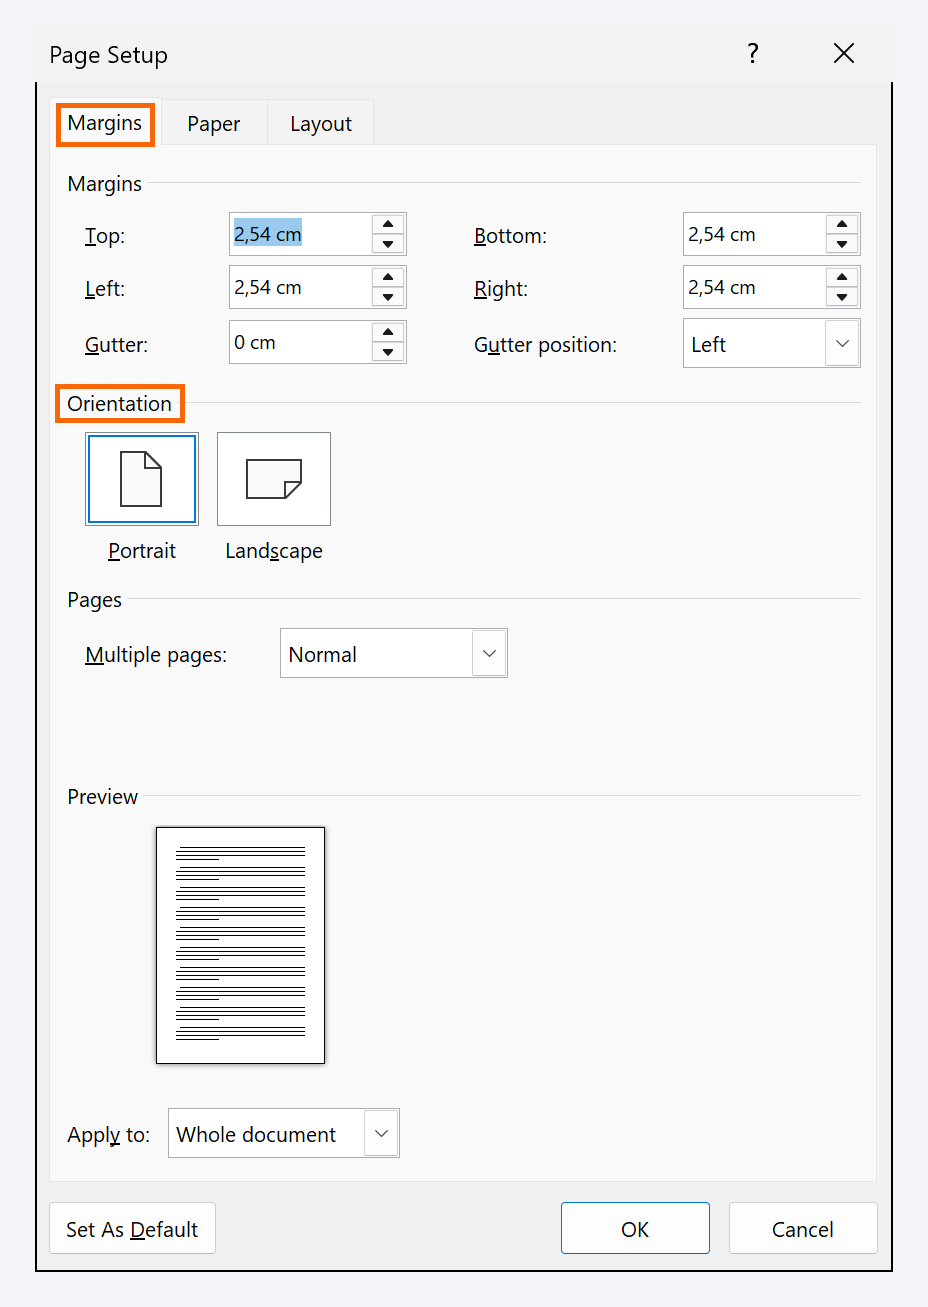
Select whole paragraphs, including the ¶ mark after the table. If you cut a paragraph in half, the leftover piece ends up on a landscape page of its own.
Or do it by hand with two section breaks
If you'd rather decide exactly where the landscape part starts and ends, put the cursor right before the content and go to Layout › Breaks › Next Page. Repeat right after it. Place the cursor inside that section and choose Layout › Orientation › Landscape: the button only acts on the section the cursor is in.
If section breaks sound like Greek to you, read Section and page breaks: when to use each first.

Check the header and page number on the landscape page
New sections are born with Link to Previous turned on: they inherit the header and the numbering continues without gaps. The number sits on the long edge of the sheet, which is now the bottom; for most reports that's fine.
If you change anything in that footer, first turn off Link to Previous in the Navigation group; otherwise the change spreads to the neighboring sections.

Save your corporate cover page to the gallery
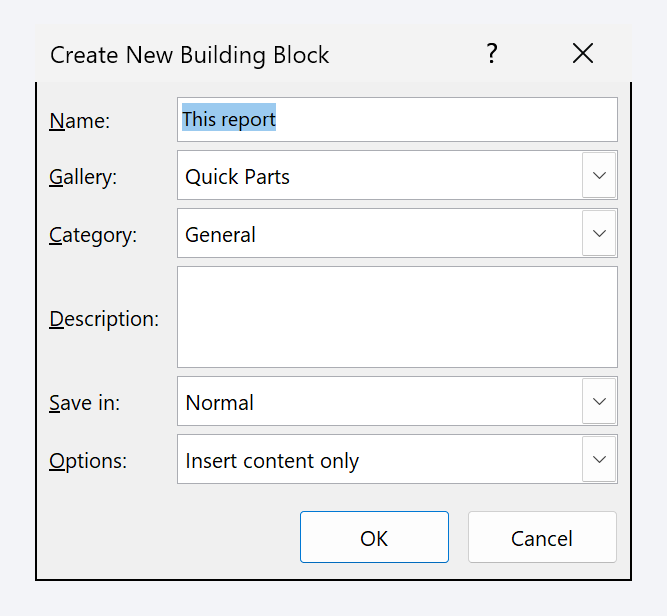
Design your cover once: logo, title, client, date, version. Select the whole content of that page (up to just before the page break) and go to Insert › Pages › Cover Page › Save Selection to Cover Page Gallery…. In the Create New Building Block dialog give it a Name, leave the gallery as Cover Pages and, under Options, choose Insert content in its own page. Click OK.
Save in decides where it lives: Building Blocks.dotx (your computer only) or your corporate template (the whole team sees it). When you close Word, accept saving the changes to the building blocks.
Expert tips
- Cover page as a chapter divider. In the gallery, right-click a design and choose Insert at Current Document Position: the same design works as the opening page of every annex or part.
- Change the title in one place. The Title control on the cover is the document's Title property. Insert it in the header too (Insert › Quick Parts › Document Property › Title) and cover and header will always agree.
- A “rotated” number for binding. If the report is printed and bound, unlink the landscape section's footer, delete the number and insert a text box in the margin with Insert › Page Number › Current Position; then rotate it with Shape Format › Text Direction.
- AI writes, you add the cover. Ask ChatGPT or Copilot for the text, paste it with paste without formatting and then insert the cover and the breaks. In a contract, a ten-column fee schedule goes in its own landscape section as an annex; the clauses stay portrait.
Common mistakes and how to fix them
Choosing Landscape rotates the whole document.
You used the Orientation button without sections. Undo with Ctrl+Z, select the content and use Custom Margins › Apply to: Selected text.
The cover title shows up in the table of contents and the Navigation Pane.
It has Heading 1 or Heading 2 applied. Select it and apply the Title style (or Normal) from Home › Styles, then update the table of contents.
The cover has no number, but the second page says “2”.
That's expected: Word counts the cover. Go to Insert › Page Number › Format Page Numbers… and set Start at: 0.
Remove Current Cover Page does nothing.
That cover didn't come from the gallery. Turn on the ¶ marks (Ctrl+Shift+8), select from the top of the page through the page break and press Delete.
In Word for Mac the gallery is under Insert › Cover Page, with Remove Current Cover Page in the same menu, and a page break is ⌘+Return. To rotate a single page, select the content and go to Format › Document › Margins, where you'll find the Apply to: Selected text dropdown. Saving your own cover to the gallery isn't available in every Mac version; if you don't see the option, keep the cover inside your corporate template instead.
Frequently asked questions
Can I make the cover landscape and the rest portrait?
Yes. The cover must be its own section (a Next Page section break right after it) and then Layout › Orientation › Landscape affects only that section.
Why does the cover go to the beginning even though my cursor is on page 5?
Because that's how the gallery is designed. If you want that design elsewhere, right-click it and choose Insert at Current Document Position.
Will my saved cover show up on my colleagues' computers?
Not if you saved it in Building Blocks.dotx: that file is yours alone. Save it in the team's template, as explained in create a corporate template.
Saved only in this browser.