Create your own ribbon tab with your favorite buttons (for example, one for reviewing)
Go to File › Options › Customize Ribbon, select Home and click New Tab. Rename the tab and its group with Rename..., pick commands from the Choose commands from list and click Add >>. Click OK and your tab appears next to Home. To share it, use Import/Export › Export all customizations.
You're reviewing a contract and you keep hopping around: Track Changes is in one group, New Comment in another, Compare further right, and Word Count tucked away at the start. Five or six buttons, always the same ones, scattered across the Review tab.
A custom tab is like a desk drawer you organize yourself: you keep only what you use, in the order you use it, under whatever name you like. We covered the basics in customize the ribbon and the Quick Access Toolbar. Here we go deep on one real scenario.
You'll build a Quick Review tab for lawyers, editors and managers who review other people's documents. By the end it will sit right next to Home, with three tidy groups, and you'll know how to hand it to your whole team.
What you'll learn
- How to decide which buttons deserve a spot on your tab
- How to create the tab, name it and split it into groups with icons
- Where to find each command without getting lost in lists of hundreds
- How to place it next to Home and hide the tabs you never use
- How to export it so your whole team gets the same tab
Step by step
List the buttons you use when reviewing
Before you change anything, jot down the commands you click in every review. For a typical reviewer: Track Changes, Display for Review, Show Markup, Previous and Next, Accept and Reject, New Comment, Compare, Word Count, Read Aloud and Restrict Editing.
Today they live on the Review tab, spread across groups such as Proofing, Comments, Tracking, Changes, Compare and Protect groups. Note each button's exact name: you'll need it to find it later.

Less is more: aim for 8 to 12 buttons. Put thirty on it and you're back to hunting.
Open File › Options › Customize Ribbon
Click File and then, at the very bottom, Options. In the Word Options window, choose Customize Ribbon in the sidebar.
You'll see two lists: on the left, Choose commands from: (the button warehouse); on the right, Customize the Ribbon: (the tabs as they appear on your ribbon).

Faster route: right-click any empty spot on the ribbon › Customize the Ribbon...
Select “Home” and click “New Tab”
In the right-hand list, click Home. Then click New Tab below the list. Word creates New Tab (Custom) right after the selected tab, with a New Group (Custom) inside it.
Selecting Home first saves you moving it later: your tab will be second on the ribbon.
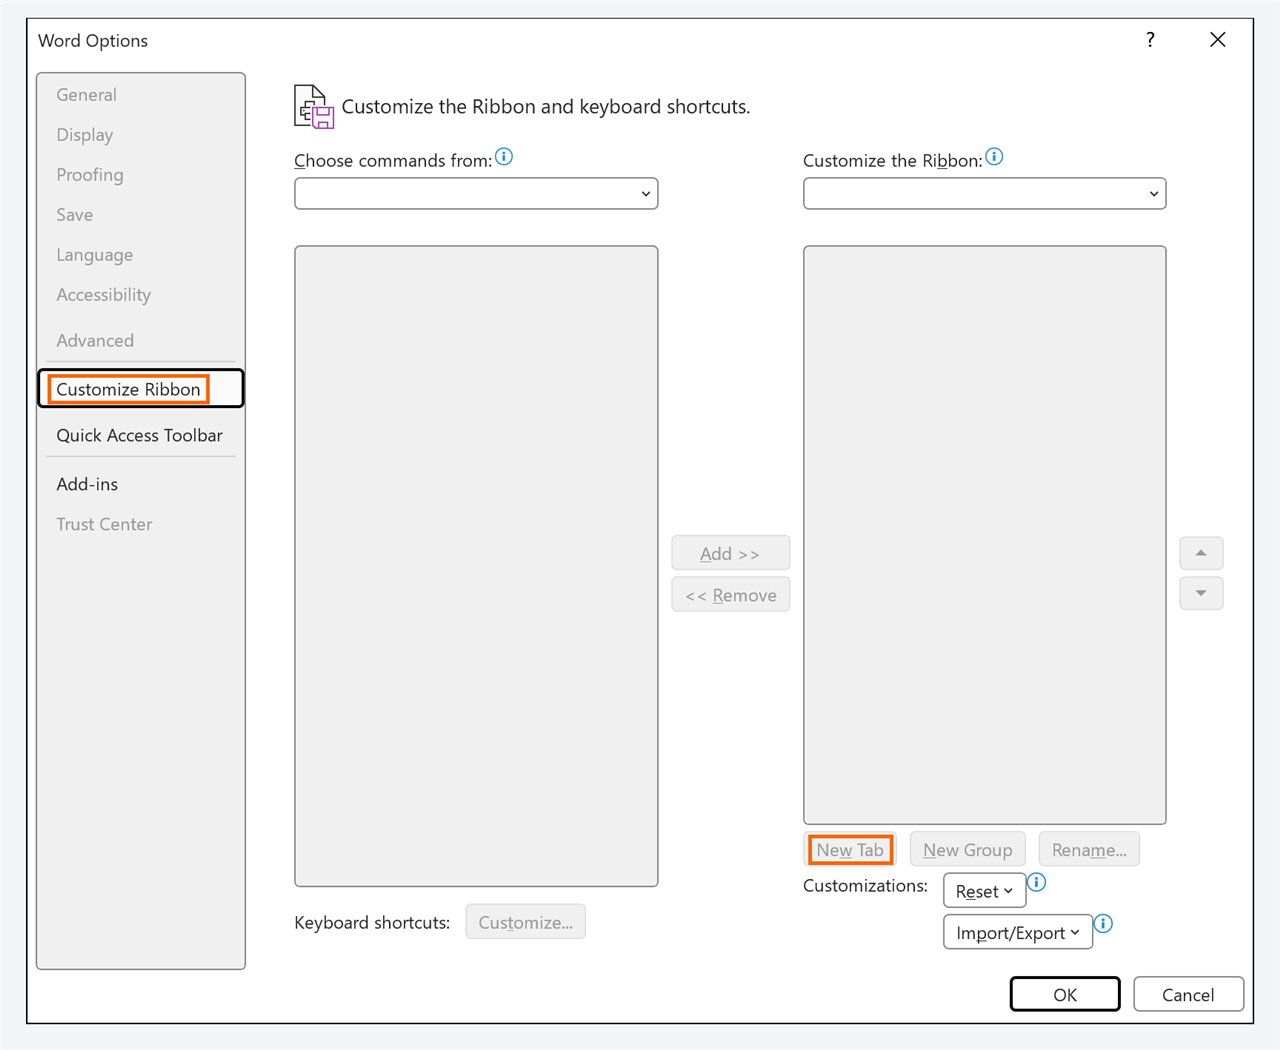
Name the tab and the groups
Select New Tab (Custom), click Rename... and type Quick Review. Then select the group and rename it Changes. For groups, the same window also lets you pick an icon.
With your tab selected, add two more groups with New Group and name them Comments & Reading and Compare & Protect.
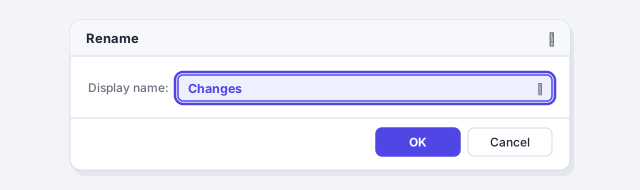
The group icon shows when the Word window is narrow and the group collapses into a single button. Pick one you'll recognize at a glance.
Pick where commands come from and click “Add >>”
On the right, select the group you want to fill. On the left, under Choose commands from:, pick a source:
- Popular Commands: a short list of the classics.
- Main Tabs: the handiest one here. Expand Review and each group, and you'll see the buttons with the same names as on the ribbon.
- All Commands or Commands Not in the Ribbon: for anything that isn't on any tab.
Select each command and click Add >>. Made a mistake? Click << Remove.
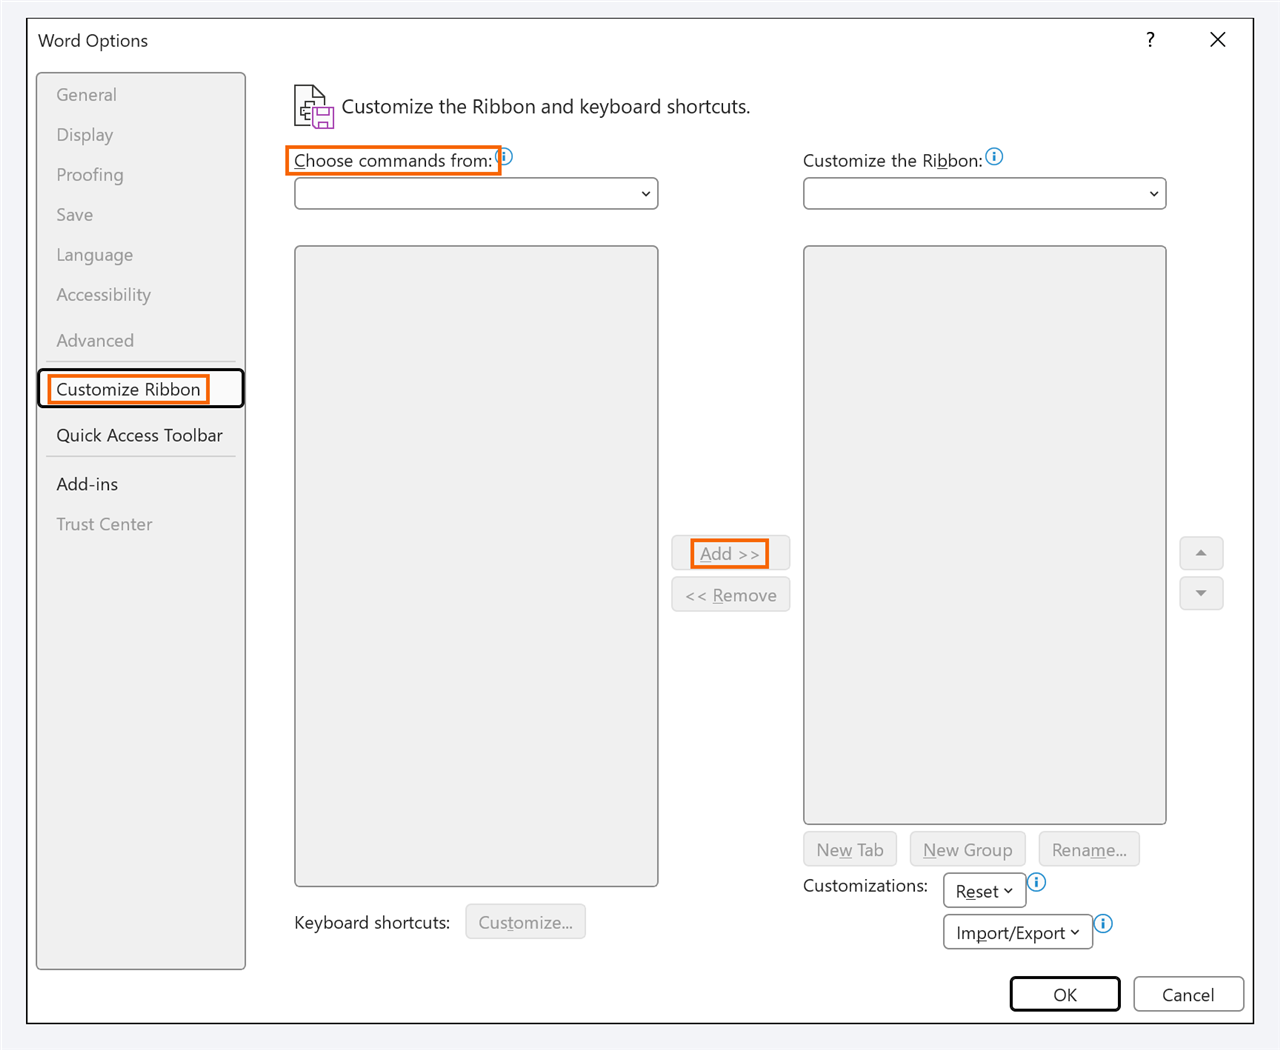
Add >> only works when a custom group is selected on the right. With a built-in group selected (for example, Font), the button stays grayed out.
Split the commands into three groups and order them
Group by task, not by habit:
- Changes: Track Changes, Display for Review, Show Markup, Previous, Next, Accept, Reject.
- Comments & Reading: New Comment, Word Count, Read Aloud.
- Compare & Protect: Compare, Restrict Editing.
Use the arrows to the right of the list to move each command or group up or down. You can also drag them with the mouse.
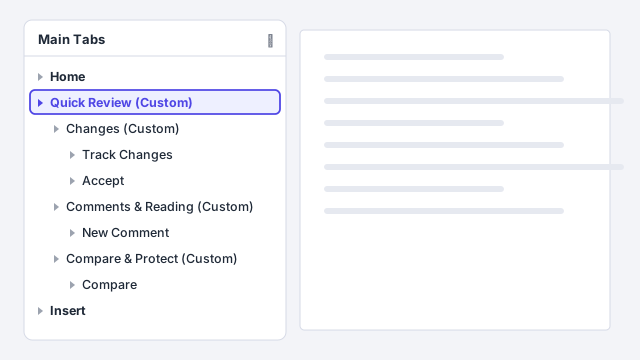
Put what you click first (Track Changes) at the start and what you use to wrap up (Restrict Editing) at the end. You'll read the tab left to right, just like the review itself.
Place it next to Home and hide what you don't use
If your tab didn't land right after Home, select it and move it up with the up arrow. Optional: clear the check box for tabs you never open (for example, Mailings or Draw). They aren't deleted, just hidden, and you can check them again any time.
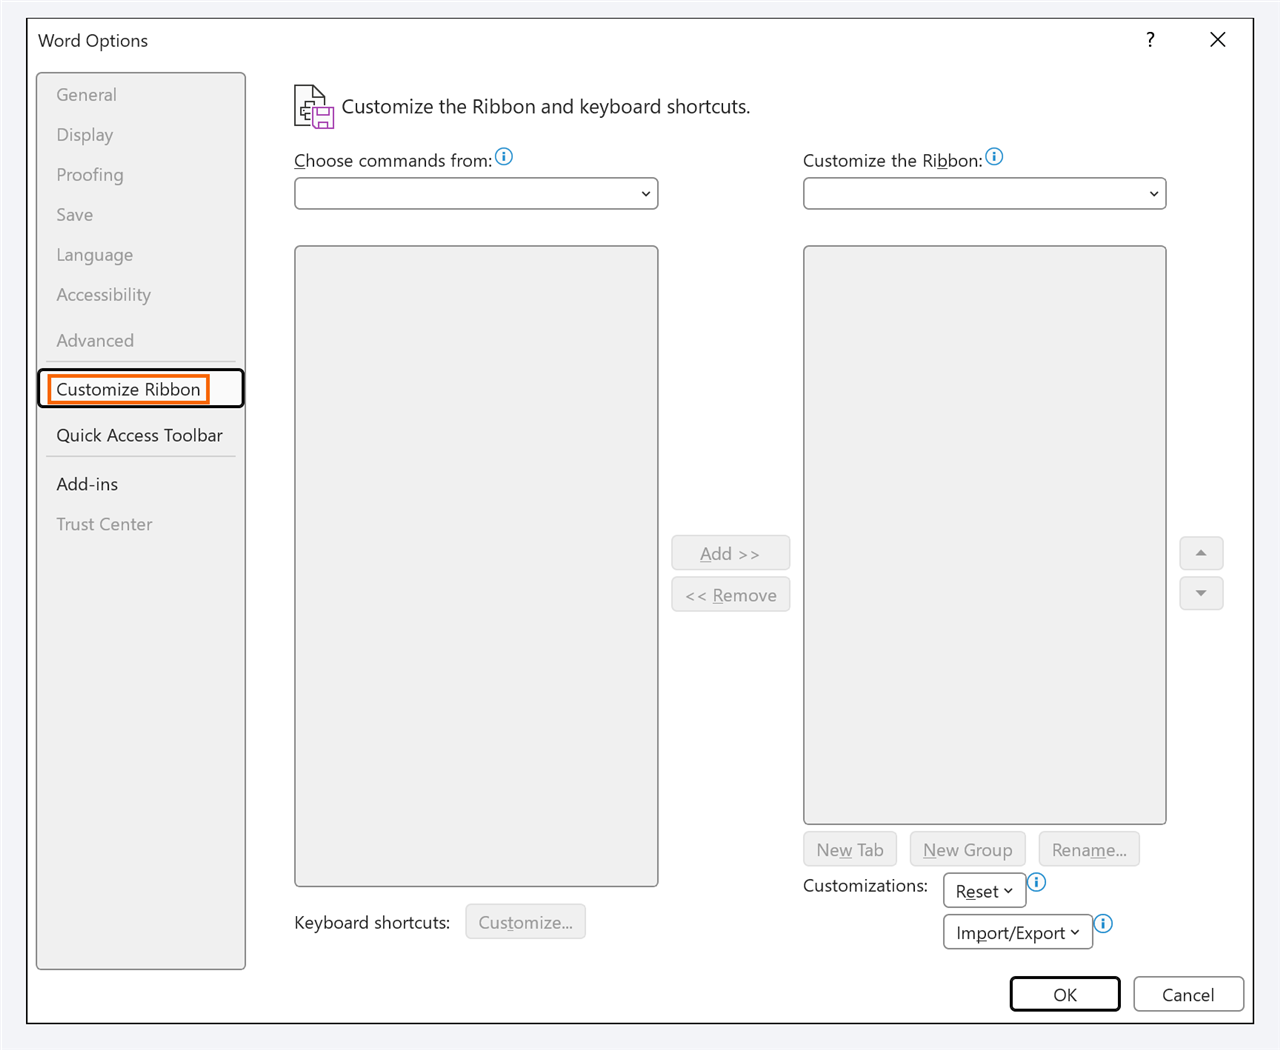
Click “OK” and try out your new tab
Click OK. Quick Review appears on the ribbon between Home and Insert, with your three groups. The buttons work exactly as they do on Review: they're the same commands, just side by side now.
Test it on a real document: turn on Track Changes, step through revisions with Next and accept or reject without leaving the tab. For a refresher, see Track Changes in Word.

Export the tab and share it with your team
Go back to File › Options › Customize Ribbon. Next to Customizations:, click Import/Export › Export all customizations. Word saves an .exportedUI file.
Put it in a shared folder. Each colleague loads it with Import/Export › Import customization file and gets the same tab, with the same buttons in the same place. Perfect for a firm that wants everyone to review the same way.

Importing replaces the importer's customized ribbon and Quick Access Toolbar. Tell your colleagues to export their own setup first if they want to keep it.
Expert tips
- Copy a whole built-in group. With Main Tabs on the left, select a built-in group (for example, Changes from Review), select your tab on the right and click Add >>: the entire group comes over as is.
- Another idea: a “Thesis” or “Contracts” tab. Add the Styles group from Home plus Table of Contents, Insert Caption, Cross-reference and Insert Footnote. If AI writes your first draft, this tab lets you format it in minutes: captions and cross-references.
- Same thing in Excel and PowerPoint. The path is identical: File › Options › Customize Ribbon. But each app keeps its own customization (and its own exported file): your Word tab won't show up in Excel.
- Drive it from the keyboard. Press Alt and Word shows letters over the tabs, including yours. Follow the letters to reach any button without touching the mouse.
Common mistakes and how to fix them
The Add >> button is grayed out and does nothing.
You have a built-in group or tab selected on the right. Select one of your own groups (the ones marked “(Custom)”) and try again.
You've moved and removed so much that the ribbon is a mess.
Select the tab you want to fix and use Reset › Reset only selected Ribbon tab. To go back to factory settings, use Reset › Reset all customizations (export first if you want to keep anything).
You send a document to a colleague and they don't see your tab.
The tab lives in your copy of Word, not in the document. Send them the .exportedUI file to import.
You can't find a command in the left-hand list.
Pick Main Tabs and look for it under its tab and group, or switch to All Commands (alphabetical). Some appear twice: once as a plain button and once with an arrow, which includes the full drop-down menu.
In Word for Mac the path is Word › Preferences (Settings in recent versions) › Ribbon & Toolbar. You can create your own tabs and groups there too, though the options differ somewhat. Don't assume a Windows .exportedUI file will work on a Mac.
Frequently asked questions
Can I add buttons straight to the Review tab?
Not to its built-in groups. What you can do is select Review, click New Group and fill that custom group inside the tab itself.
Will my tab show up in all my documents?
Yes. It's saved in your Word settings, not in the file, so you'll see it in any document you open on that computer.
If I delete my tab, do I lose the commands?
No. Your tab only holds shortcuts to commands that stay in their original place. Removing it (with << Remove or Reset) doesn't touch the Review tab.
What if I only need two or three buttons?
Then you don't need a tab: the Quick Access Toolbar is enough. We explain it in customize the ribbon and the Quick Access Toolbar.
Official sources
Microsoft documentation consulted for this guide.
Saved only in this browser.