Automatic fields: date, file name and data that updates itself
A field is a placeholder Word fills in for you: the date, file name, page count or author. Insert one from Insert › Text › Quick Parts › Field. Use SaveDate or CreateDate instead of Date, which changes every time the file is opened. F9 updates fields and Alt+F9 shows the codes. In contracts, type the signature date as fixed text.
It happens more often than you think: you print the “final” version of a document and nobody knows which file it came from, or the footer says “Page 3 of 10” when the document now has twelve. Or worse: you open a contract signed months ago and the date on page one says today.
Behind all of this are fields. A field works like a spreadsheet cell with a formula: inside it stores an instruction (the field code, for example { NUMPAGES }) and outside it shows the result (12). Word recalculates the result when you ask it to, or at certain moments such as printing.
In this guide you'll learn to insert the fields that actually matter in a law firm or a company, pick the right date for each case and freeze what must never change.
What you'll learn
- What a field is and how to see its code with Alt+F9
- Which date to use: Date, CreateDate, SaveDate or PrintDate
- How to put the file path and “Page X of Y” in the footer
- How to use document properties (author, title) in the text
- How to lock a field or turn it into text before signing
Step by step
Understand the difference between code and result
Every field has two faces. The code is the instruction in braces, for example { SAVEDATE \@ "MM/dd/yyyy" }. The result is what you see and print: 10/03/2026. Press Alt+F9 to switch between the two views across the whole document; press it again to go back.
Many Word features you use every day are already fields: page numbers, the automatic table of contents and cross-references.

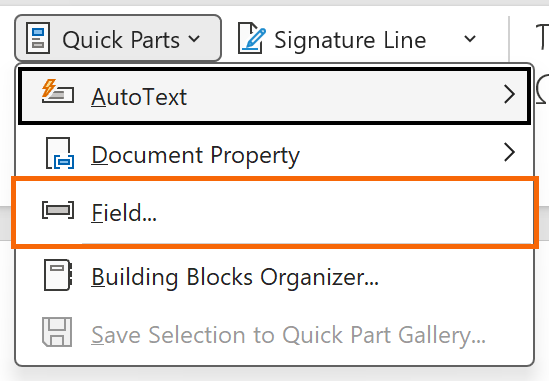
Open the Field dialog from Quick Parts
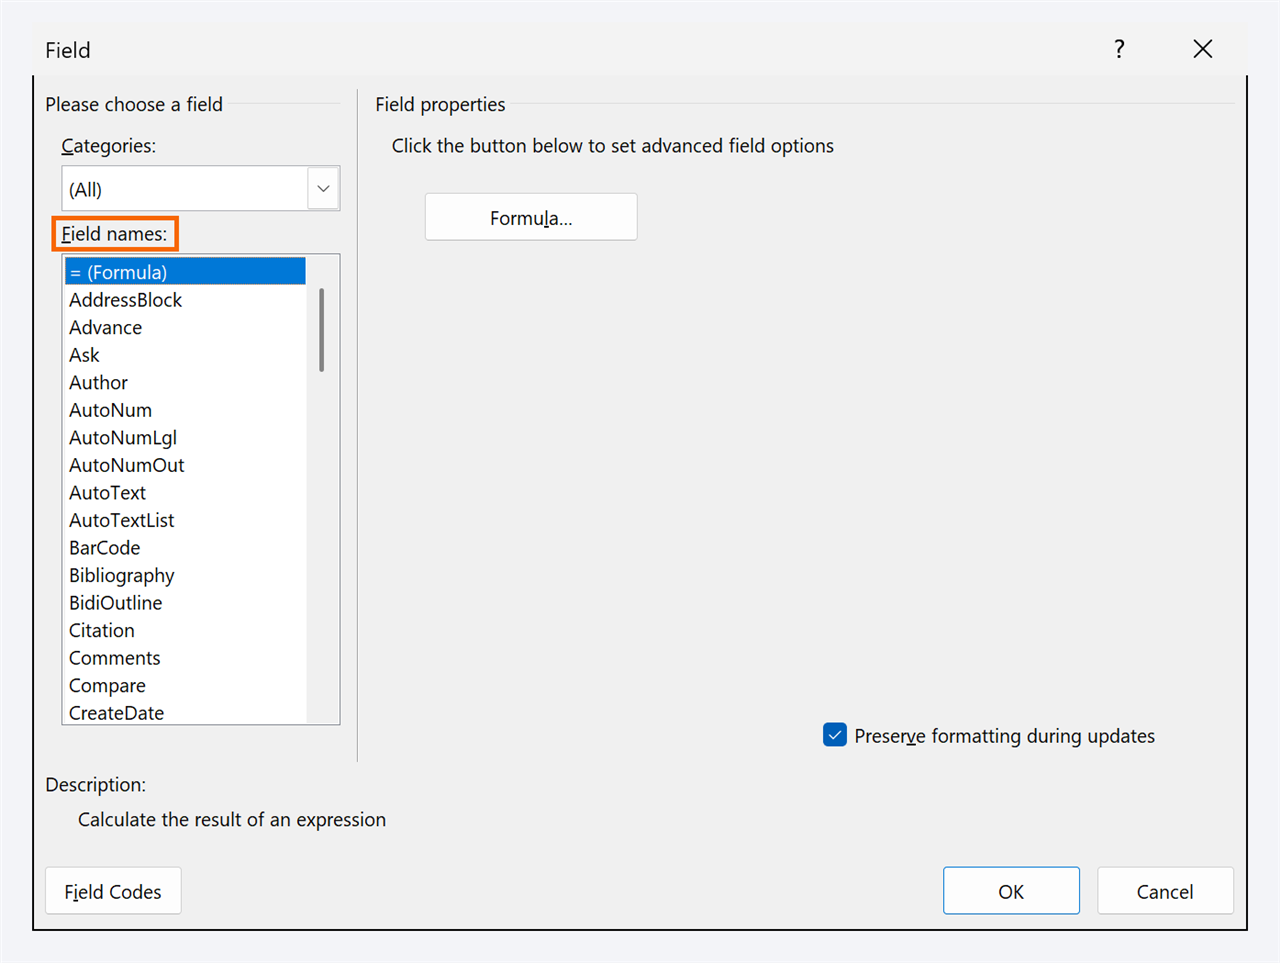
Put the cursor where you want the data and go to Insert › Text › Quick Parts › Field…. The Field dialog opens: on the left you pick the Category and field name; in the middle, its properties (such as the date format); on the right, extra options.
Field names are the same in every language version of Word (SaveDate, FileName, NumPages): the code is universal.
Leave “Preserve formatting during updates” checked: if you make the field bold, it stays bold when it updates.
Pick the right date: they don't all behave the same
Under Categories choose Date and Time. You'll see four date fields that look alike but aren't:
| Field | What it shows | Use it for |
|---|---|---|
DATE | Today's date, every time the file is opened or printed | Letter templates filled in and sent the same day |
CREATEDATE | When the file was created (or saved with Save As) | Origin date of a matter file or report |
SAVEDATE | The last time it was saved | Version control in the footer |
PRINTDATE | The last time it was printed | Knowing how old a paper copy is |
Under Date formats pick one from the list or type your own, for example MMMM d, yyyy for “October 3, 2026”.
DATE doesn't store the date you wrote the document: it shows today's. In a contract, pleading or set of minutes, that means the document “changes date” every time someone opens it.
Put the file path and “Page X of Y” in the footer
Double-click the footer and insert, from the same Field dialog:
FILENAME(category Document Information): the file name. Check Add path to filename and you get{ FILENAME \p }, with the full folder.PAGE: the current page number.NUMPAGES: the total pages in the document.SECTIONPAGES: the pages in the current section. Handy for exhibits: “Exhibit B – page 2 of 4”.
Type “Page ”, insert PAGE, type “ of ” and insert NUMPAGES. Legal example: with the path and SAVEDATE in the footer, every printed draft says which file and which day it came from.

Fill in the properties and bring them into the text
Go to File › Info. In the right panel, under Properties, fill in Title and check the Author; Show All Properties reveals more (company, subject, category).
Then, in the document, use Insert › Quick Parts › Document Property and choose, for example, Title. This inserts a linked box: edit it in the text and the property changes, and vice versa. If you prefer a classic field, use TITLE or AUTHOR from the Field dialog.

In a contract template, put the client's name in the Company property and repeat it with Document Property: change it in one place and it updates everywhere.
Show the chapter title in the header with STYLEREF
The STYLEREF field copies the text of the nearest paragraph with a given style. In the header, open the Field dialog, choose the Links and References category, the StyleRef field and the Heading 1 style: each page shows the title of the chapter it belongs to. It only works if your headings use real styles. We cover it in depth in headers and footers.
Type and update fields from the keyboard
Field braces can't be typed with the normal keys: if you type { and }, Word sees text, not a field. Press Ctrl+F9 to create a pair of field braces, type the code inside (for example NUMPAGES) and press F9 to see the result.
| Key | What it does |
|---|---|
| F9 | Updates the selected fields (select everything first to update the whole document) |
| Alt+F9 | Shows or hides the codes for the whole document |
| Shift+F9 | Shows or hides the code of the selected field |
You can also right-click a field: Update Field, Edit Field… or Toggle Field Codes.

If an AI gives you a field code, don't paste it as is: create the braces with Ctrl+F9 and type only the text inside.
Make fields visible and update them before printing
To tell automatic content from typed text at a glance, go to File › Options › Advanced, section Show document content, and set Field shading to Always. Fields get a gray background on screen; that gray never prints.
Then, in File › Options › Display, under Printing options, check Update fields before printing. You'll never print an outdated “Page 3 of 10” again.

Freeze what must not change: the signing date as text
In a contract, the line “Signed in New York on October 3, 2026” must be fixed text, never a DATE field. If you use Insert › Text › Date & Time, uncheck Update automatically: Word types the date as plain text.
If the field is already there, you have two ways out. Lock it (Ctrl+F11; Ctrl+Shift+F11 unlocks it): it's still a field, but F9 no longer changes it. Or unlink it (Ctrl+Shift+F9): it becomes text for good. If you prefer menus, copy the field and paste it with Home › Paste › Keep Text Only; or add the Lock Fields and Unlink Fields commands from File › Options › Quick Access Toolbar, under Commands Not in the Ribbon.
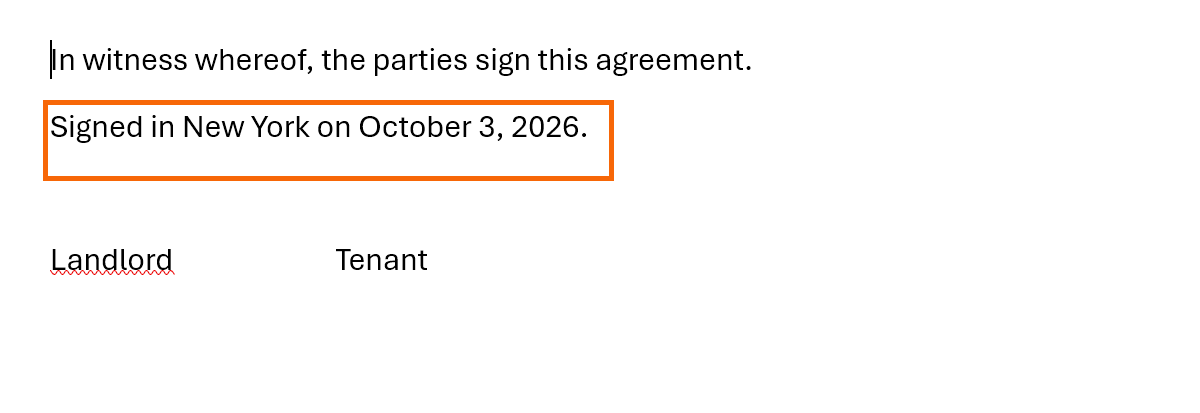
Unlinking can't be reversed (except with an immediate Ctrl+Z). Do it on the final version, right before signing or exporting to PDF.
Expert tips
- Update everything at once. Select the whole document (Ctrl+A) and press F9. Fields in headers and footers update when you print, or when you double-click into them, select them and press F9.
- Jump from field to field. F11 goes to the next field and Shift+F11 to the previous one: ideal for checking a template before sending it.
- Watch the metadata. AUTHOR, TITLE or FILENAME \p can show data you don't want the client to see (your user name or the server path). Check them before sending: how to remove metadata.
- AI writes, fields count. If you ask ChatGPT or Copilot for the draft, don't let it type page numbers or version dates: add them yourself with fields and they'll stay up to date on their own.
Common mistakes and how to fix them
An old contract shows today's date when you open it.
It has a DATE field. Press Alt+F9 to confirm and replace it with the real date typed as text, or correct the date and unlink the field with Ctrl+Shift+F9.
The STYLEREF field shows an error message instead of the heading.
It can't find any paragraph with that style. Apply the Heading 1 style to your headings or edit the field to point at the style you actually use.
You type braces by hand and the field does nothing.
Typed braces are just text. Delete them, press Ctrl+F9 to create field braces, type the code inside and press F9.
The page total is wrong after you add text.
Fields don't always recalculate instantly. Press F9 on them or turn on Update fields before printing in File › Options › Display.
In Word for Mac the Field dialog is under Insert › Quick Parts › Field… or the Insert › Field… menu in the menu bar. Field braces are created with ⌘+F9 and codes are shown with ⌥+F9 (on some keyboards you also need fn). Field shading is set in Word › Preferences › View.
Frequently asked questions
What's the difference between DATE and SAVEDATE?
DATE always shows today's date; SAVEDATE shows when the file was last saved. To identify versions, use SAVEDATE; for a signed document, use neither: fixed text.
Why does my field show strange code in braces?
Field code view is on. Press Alt+F9 to see the results again, or right-click the field and choose Toggle Field Codes.
Does the gray field shading show up in the PDF or on paper?
No. Field shading is only an on-screen aid; it doesn't print or appear when you save as PDF.
What's the difference between Document Property and the AUTHOR or TITLE fields?
Document Property inserts a box linked both ways: edit it and the property changes. AUTHOR or TITLE fields only read the property and update with F9.
Official sources
Microsoft documentation consulted for this guide.
Saved only in this browser.